DIY Kids Costume

DIY Astronaut Costume for Kids

A handmade spacesuit, helmet + light-up rocket jetpack for one seriously magical trip to space.

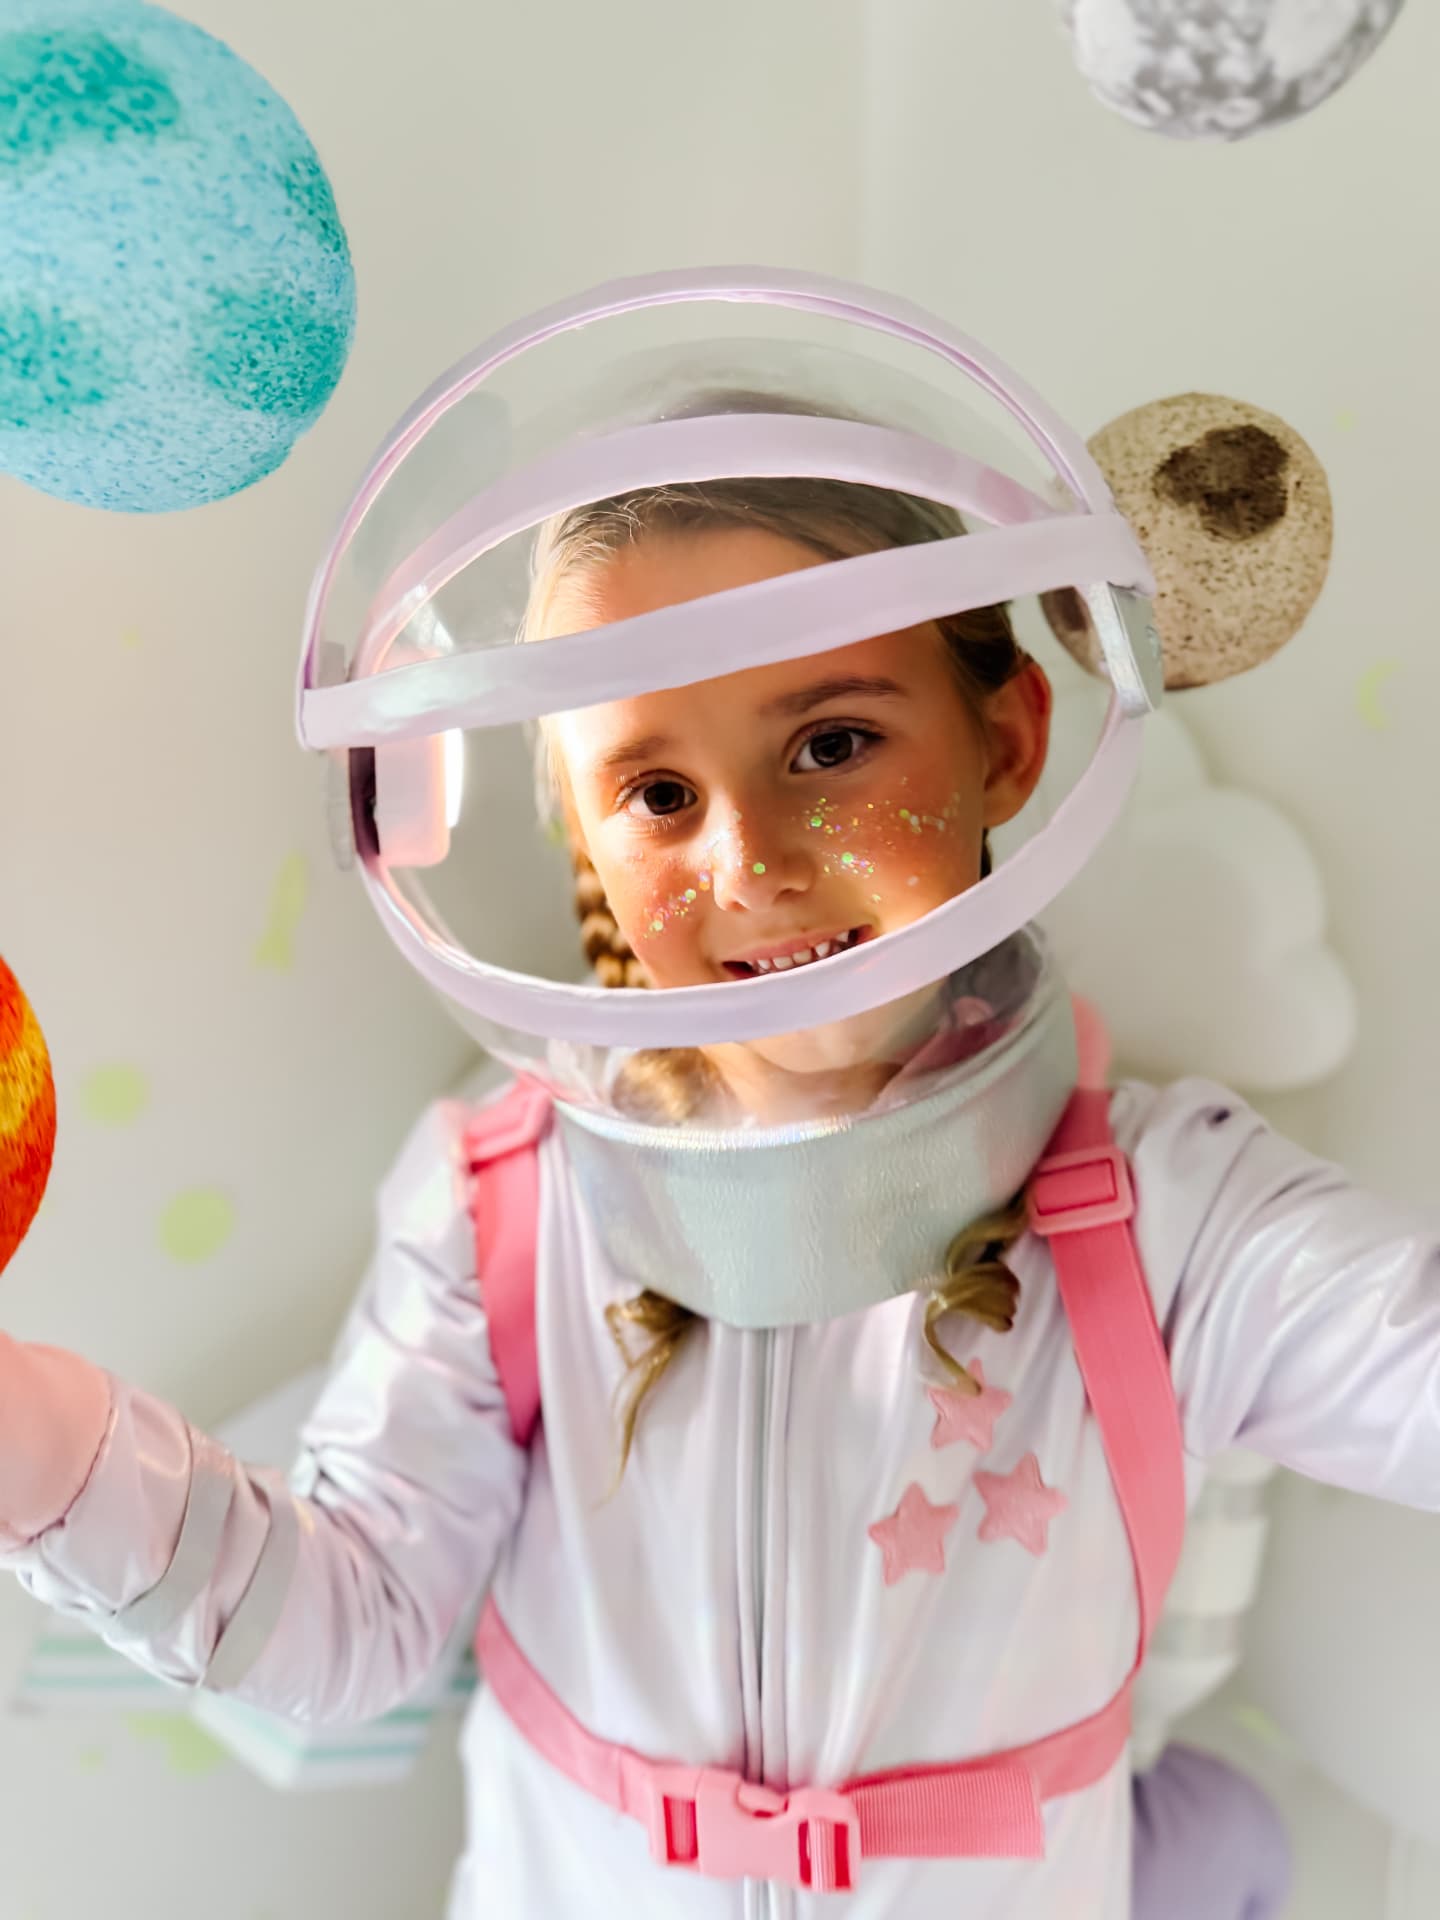
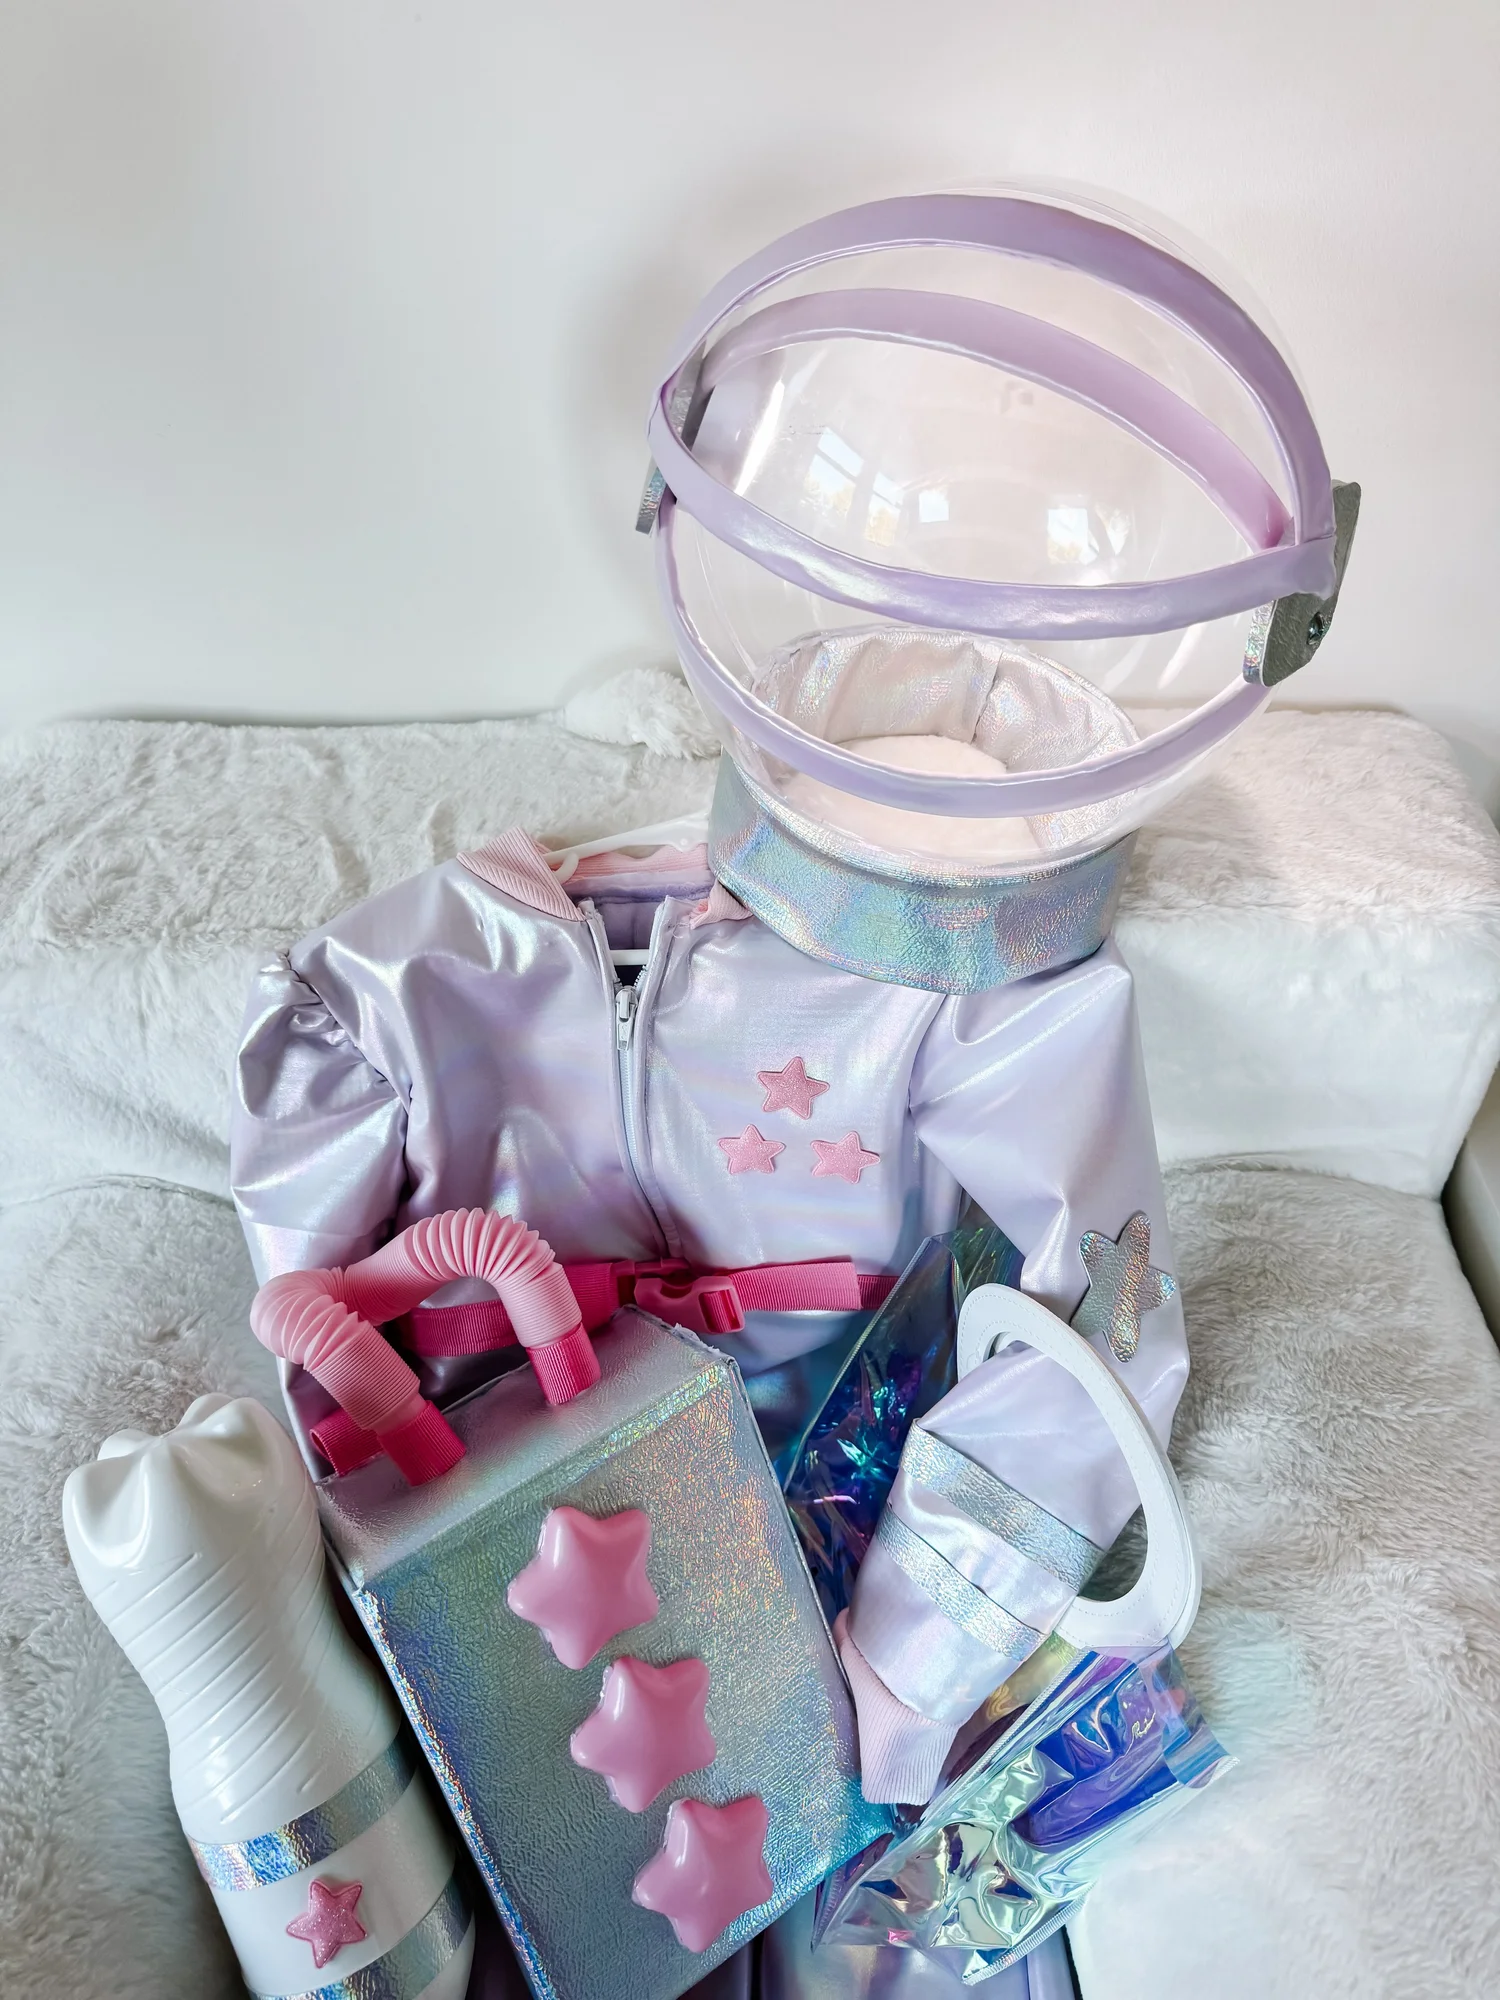
Blast off into creativity with this dreamy DIY astronaut costume that's out of this world. Whether your little one is dressing up for Halloween, a school space day, or just wants to explore the galaxy during imaginative play, this sparkly astronaut outfit is a girly twist on the classic spacesuit — metallic pastels, shimmer and stars, equal parts space explorer and shooting star.

The best part: you can make it at home with simple craft supplies, a few recycled bottles and a little creativity. Here's the whole build, step by step.
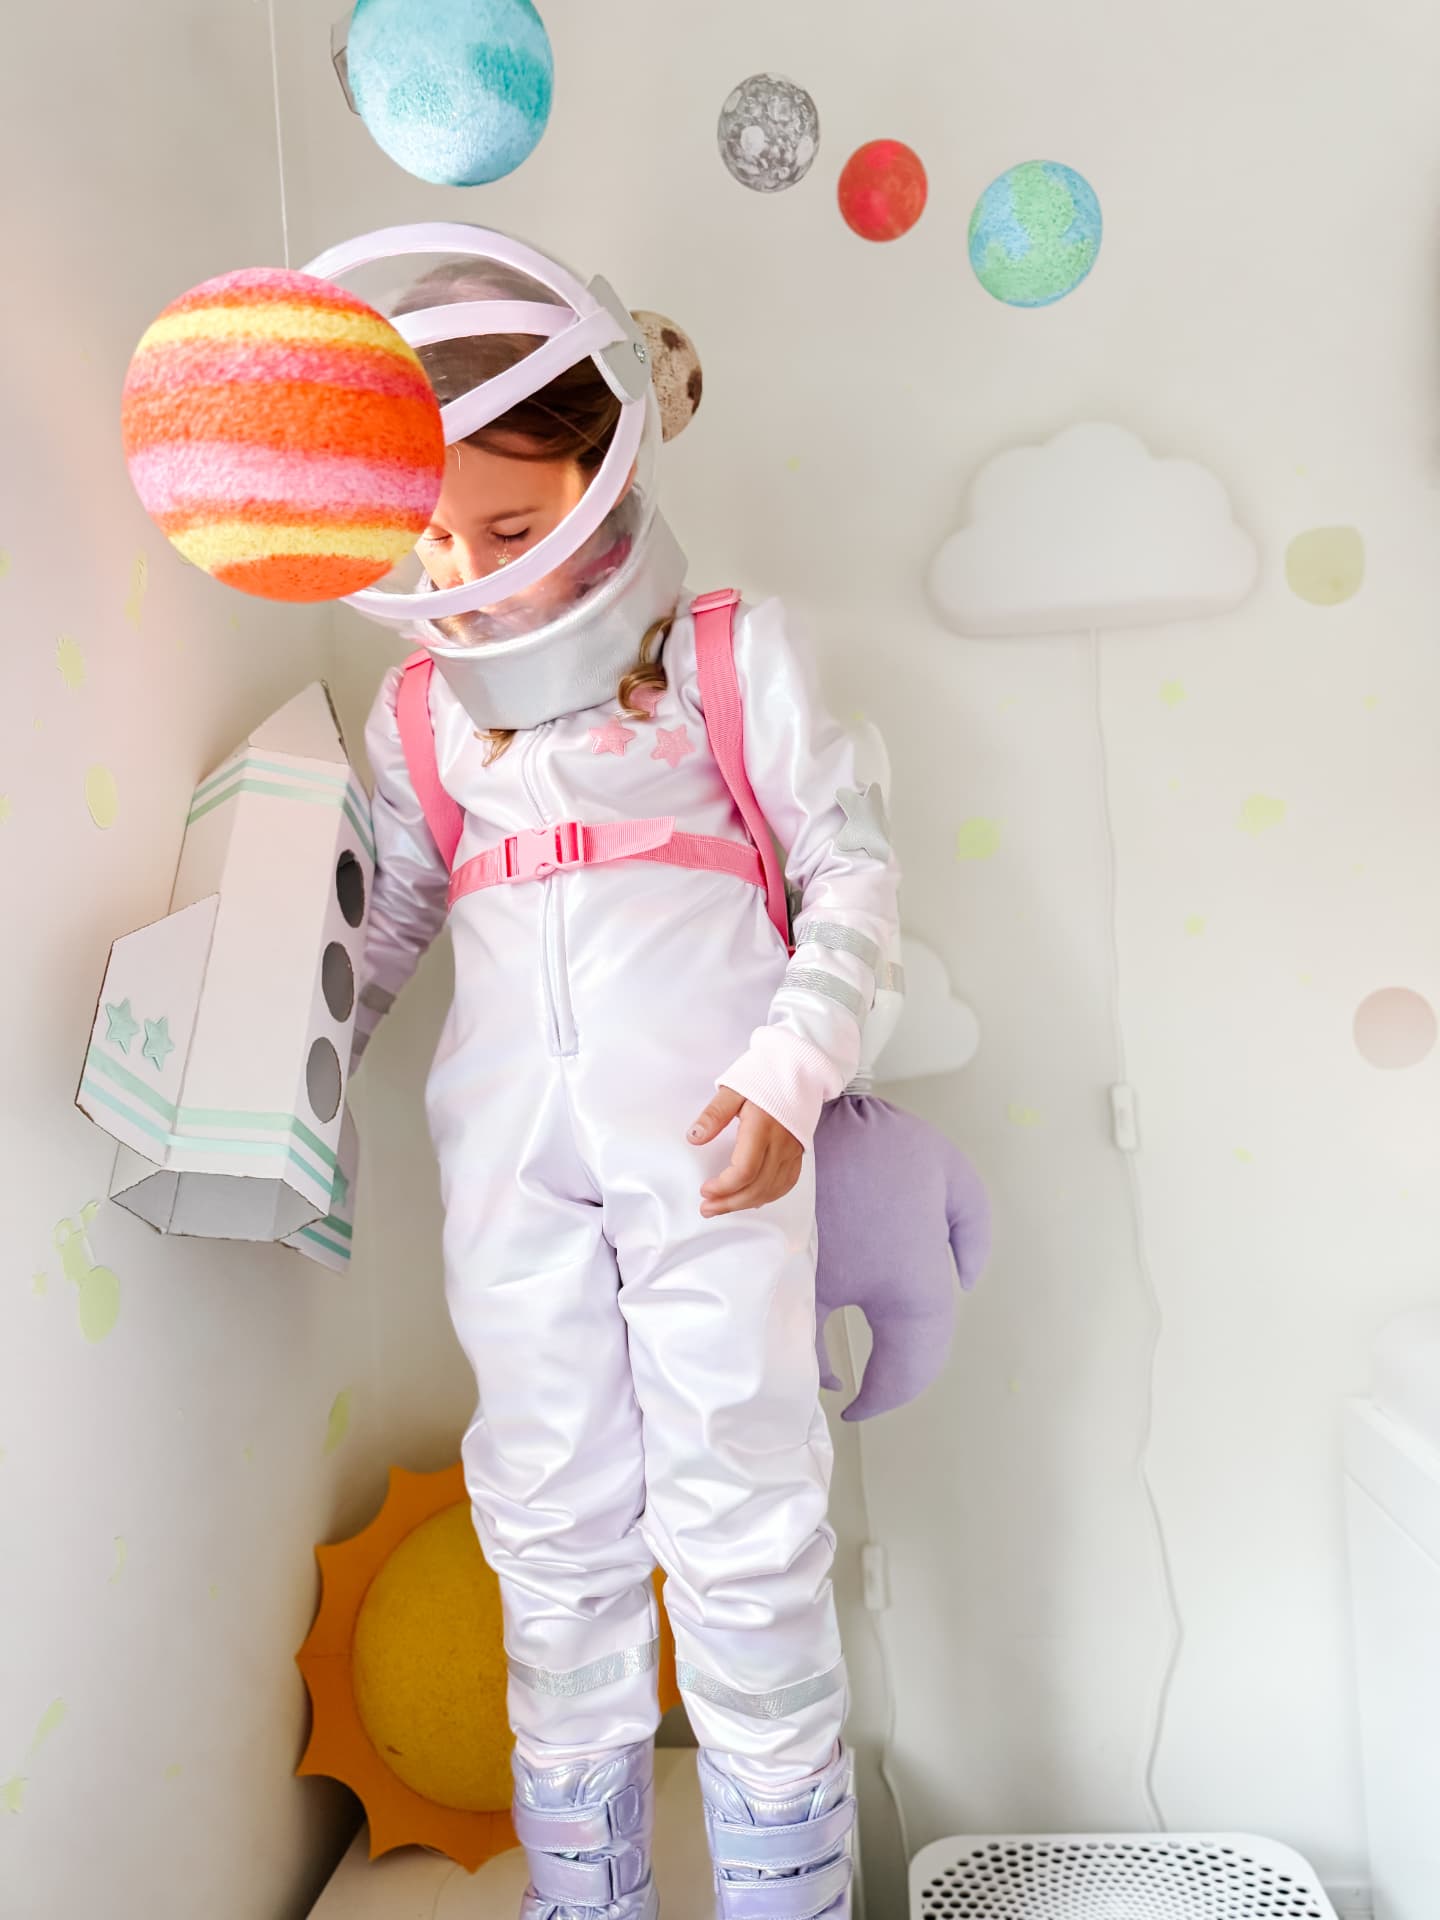
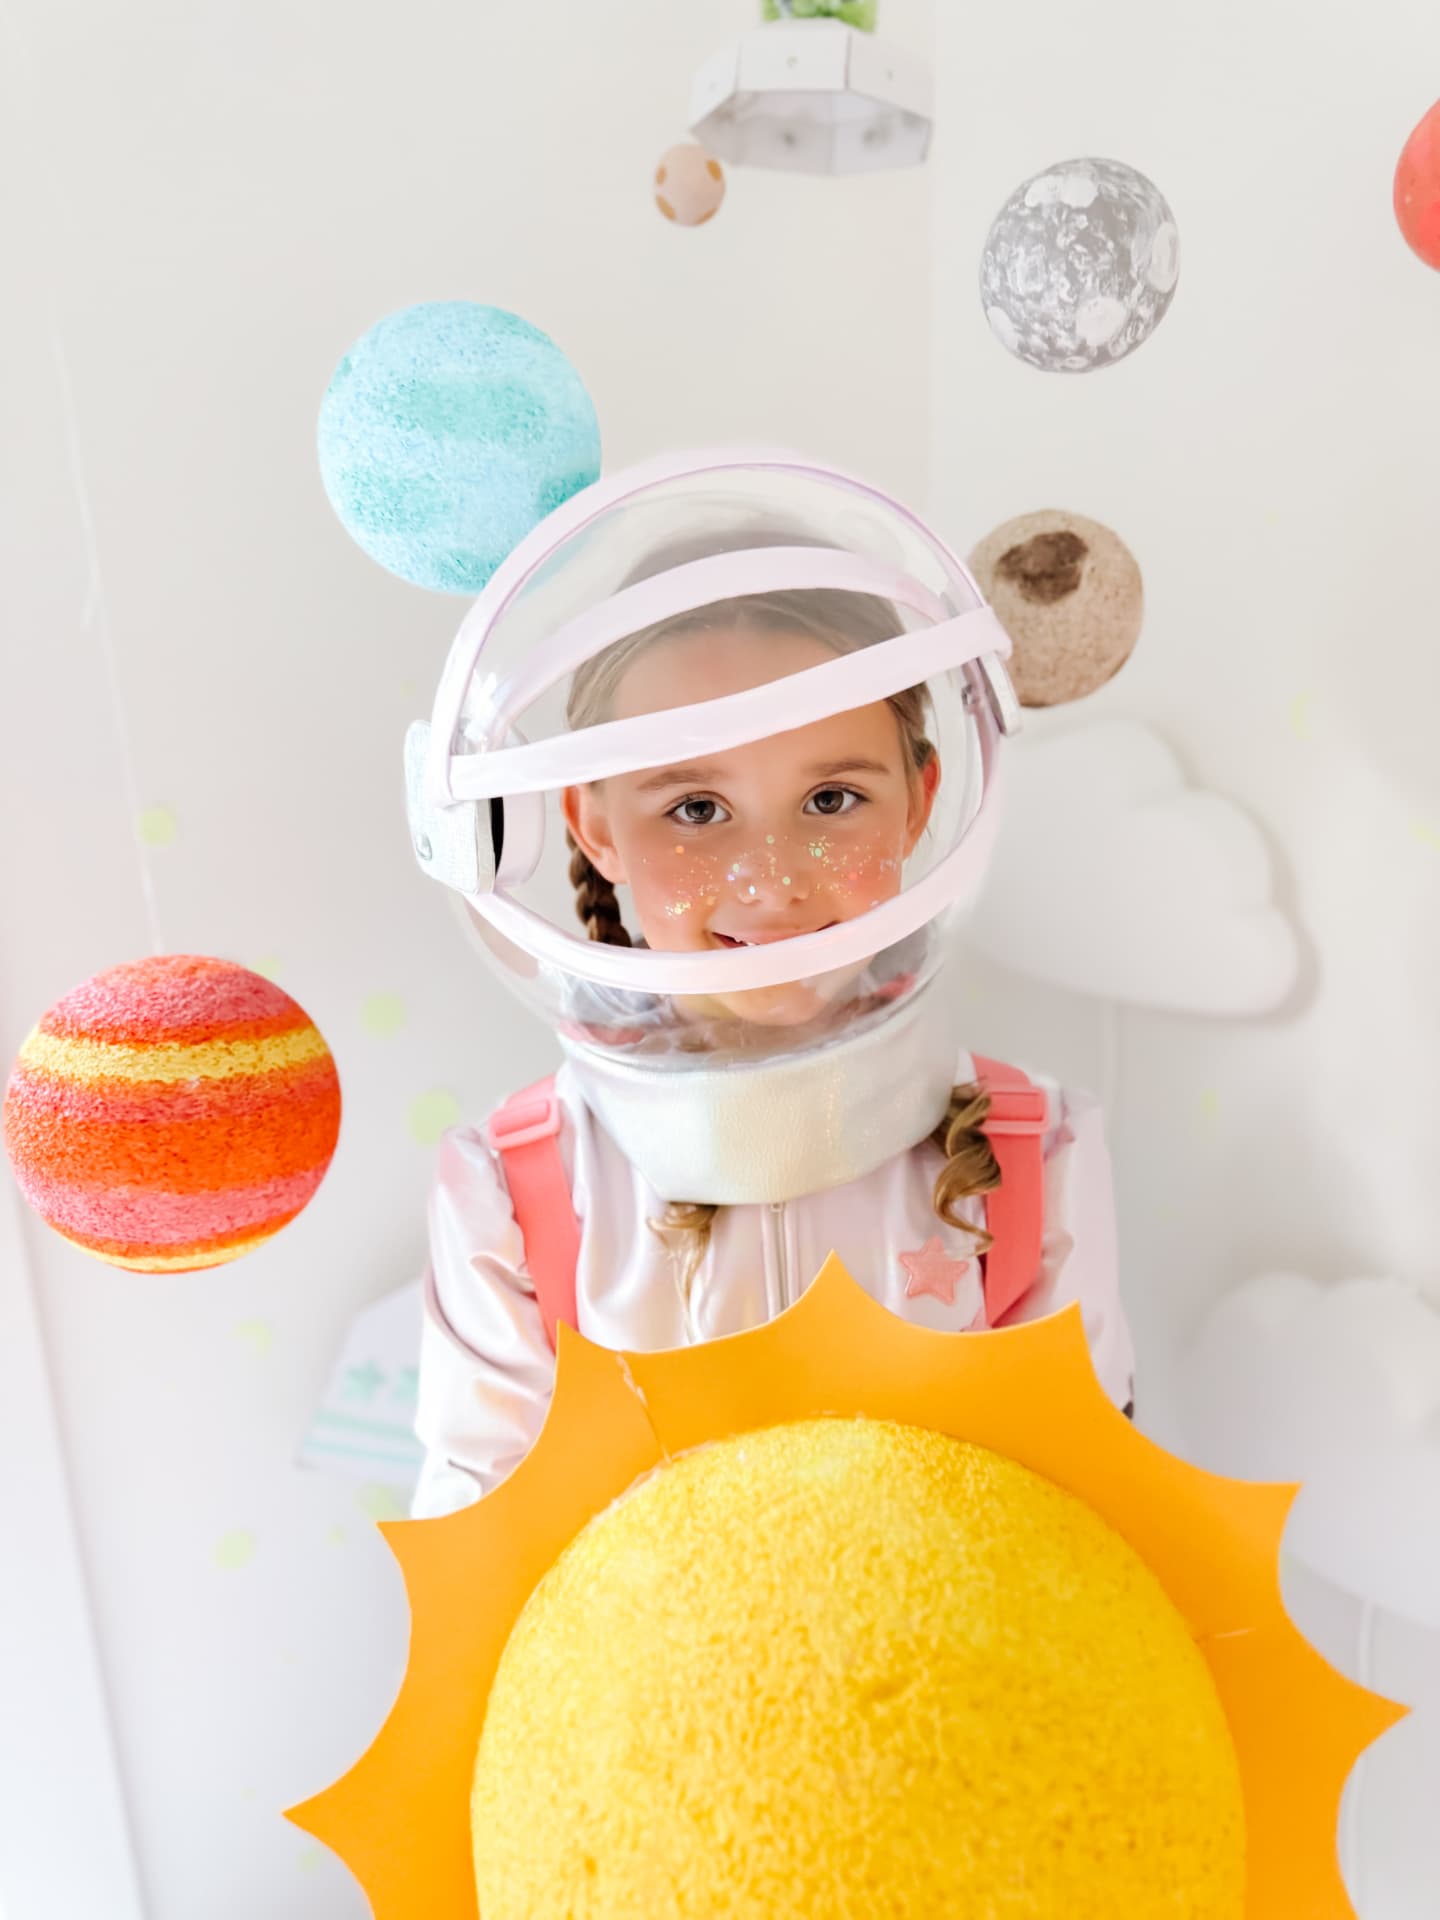
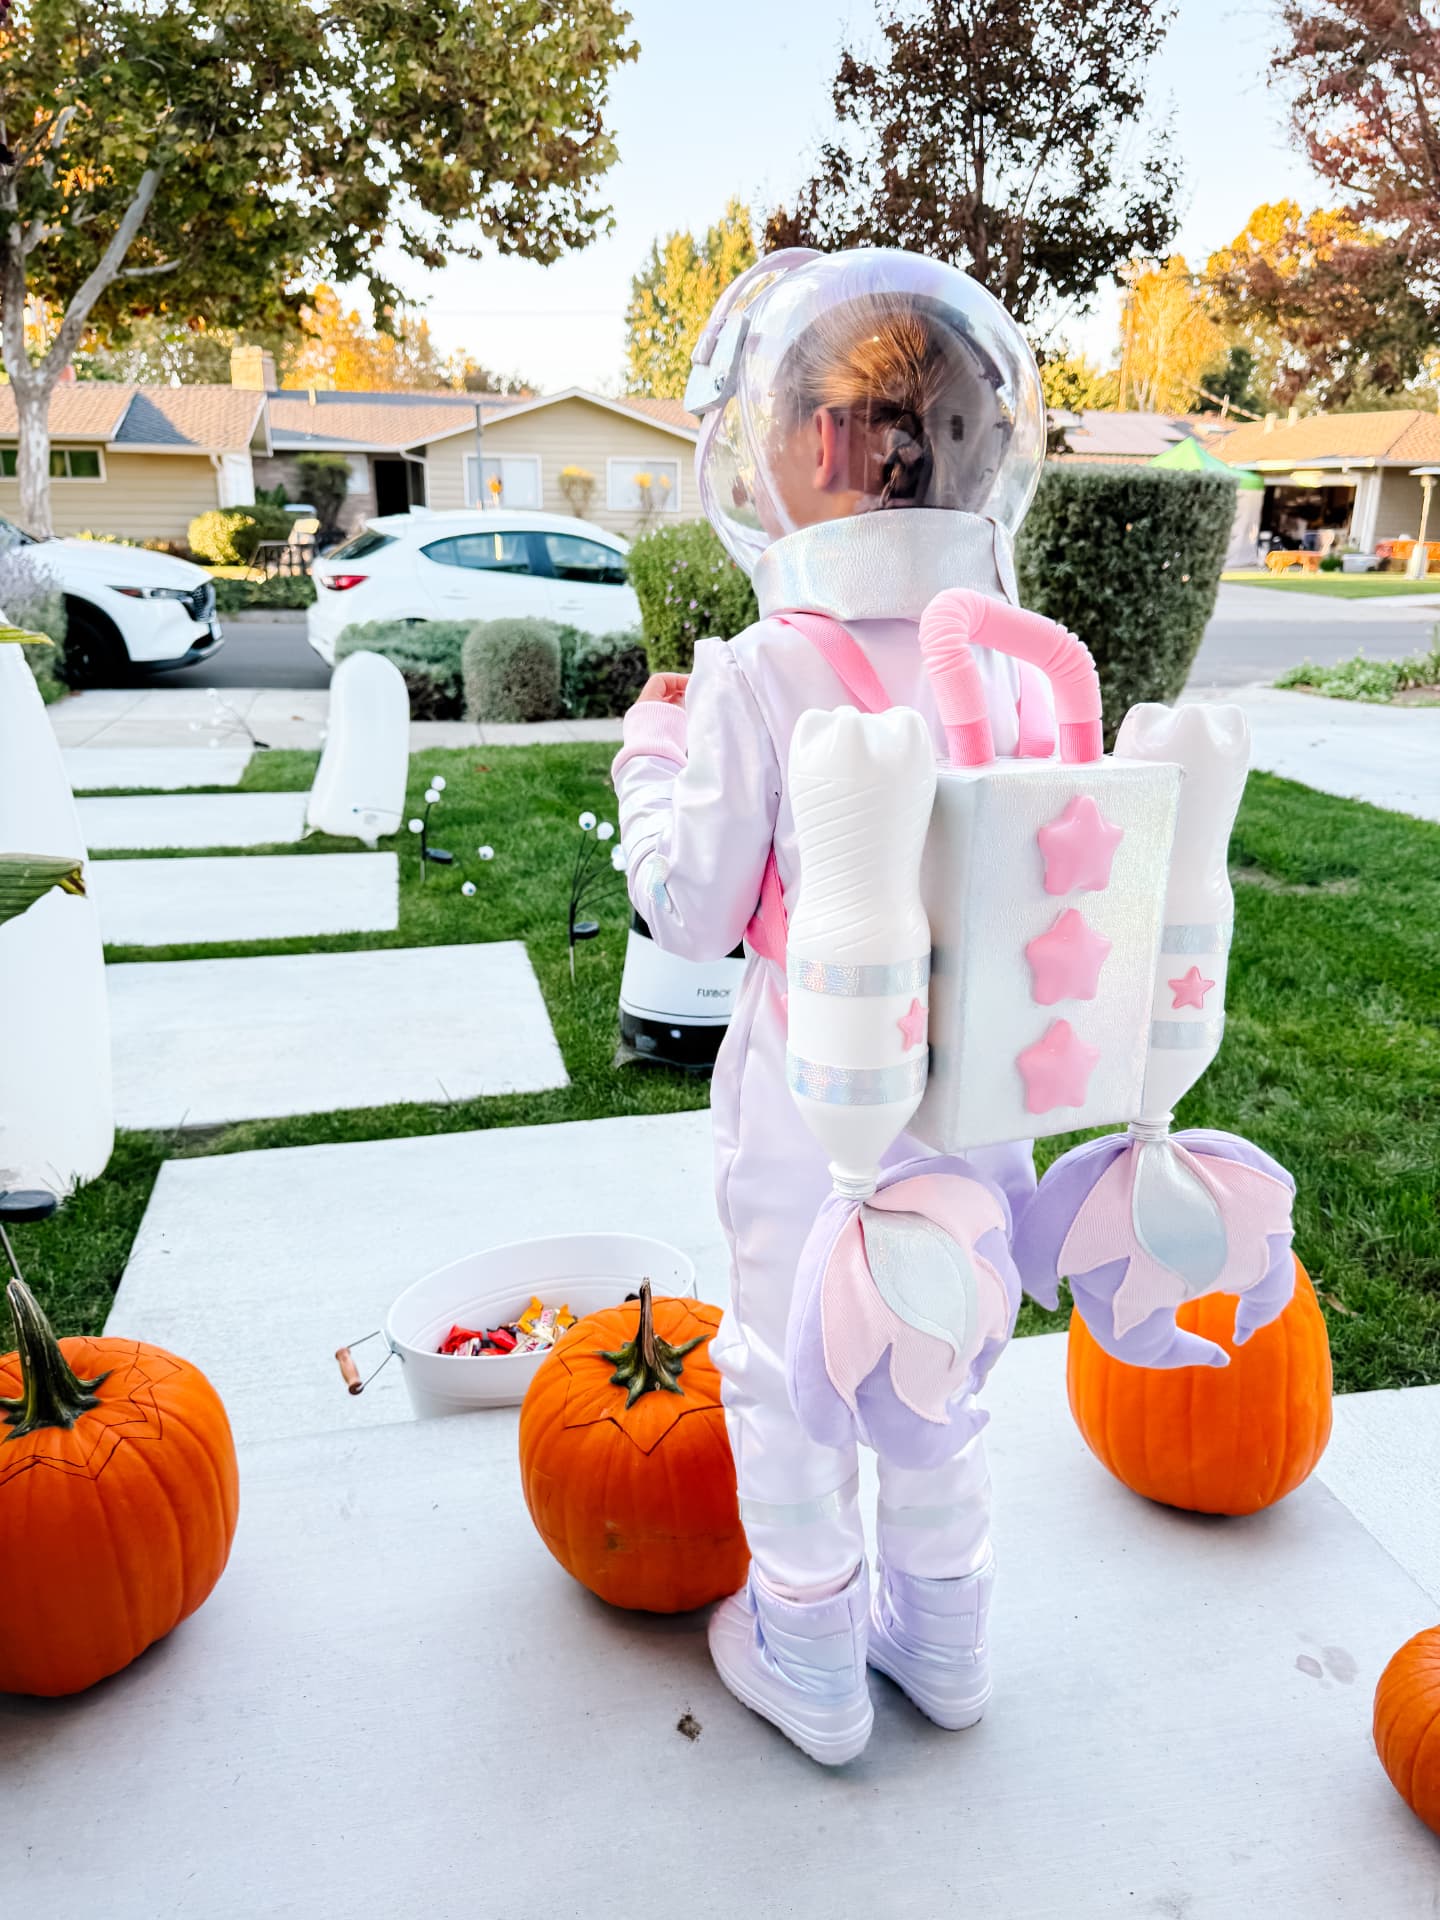
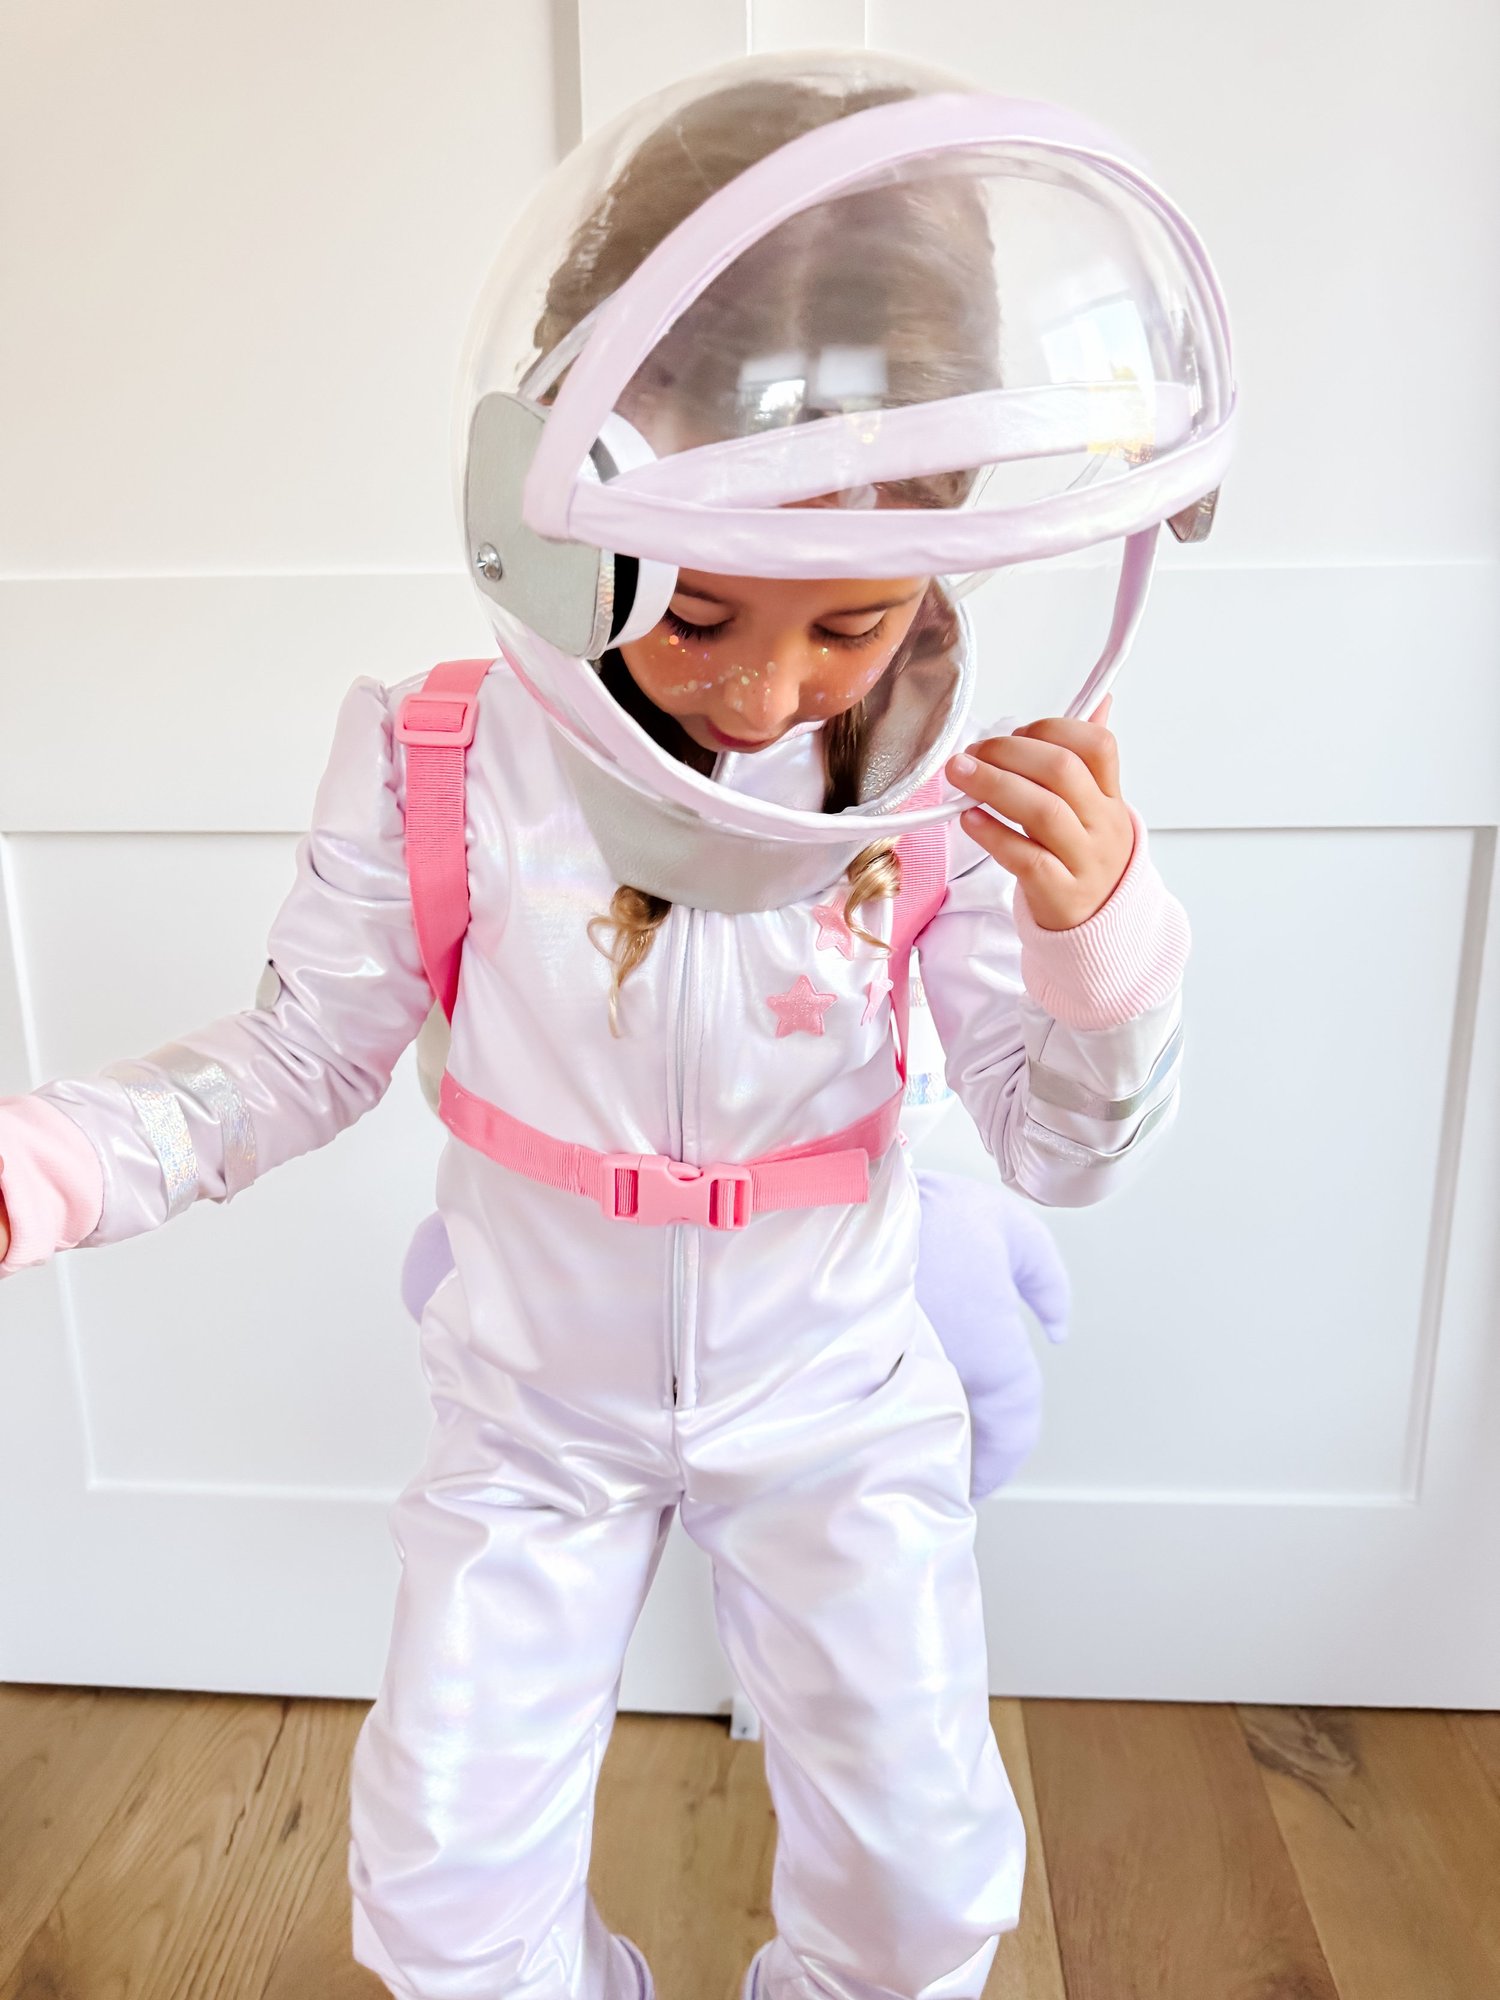
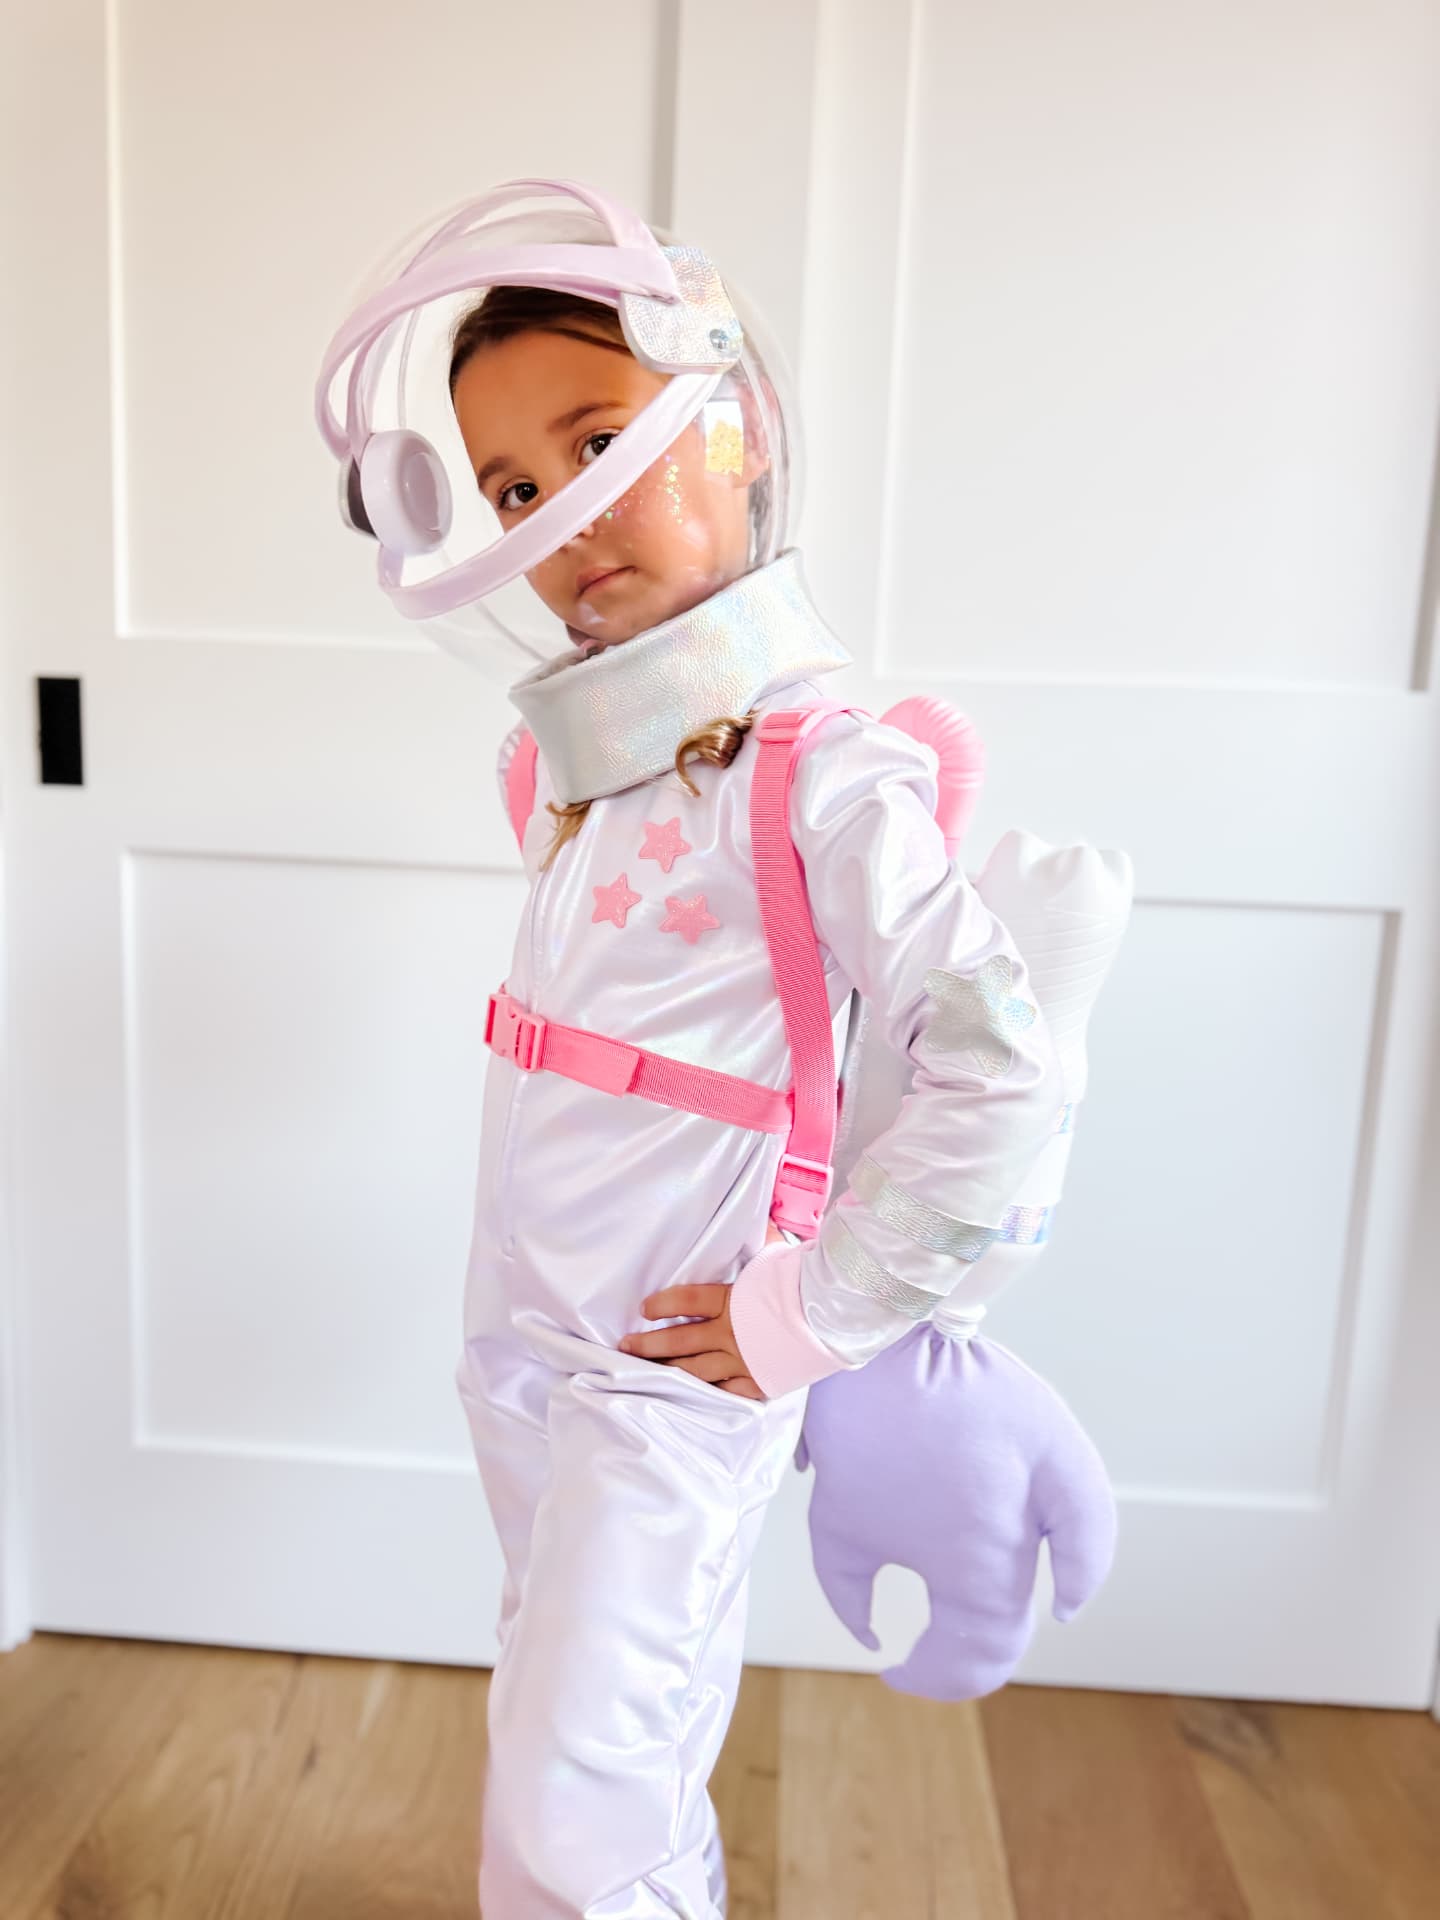
Child wearing a handmade pink and purple astronaut costume with a clear helmet and rocket jetpack
Ages
3+
Project
Costume
Difficulty
Ambitious
Theme
Space
Best for
Halloween + Pretend Play

Before you read a single instruction, here's exactly what you're making.
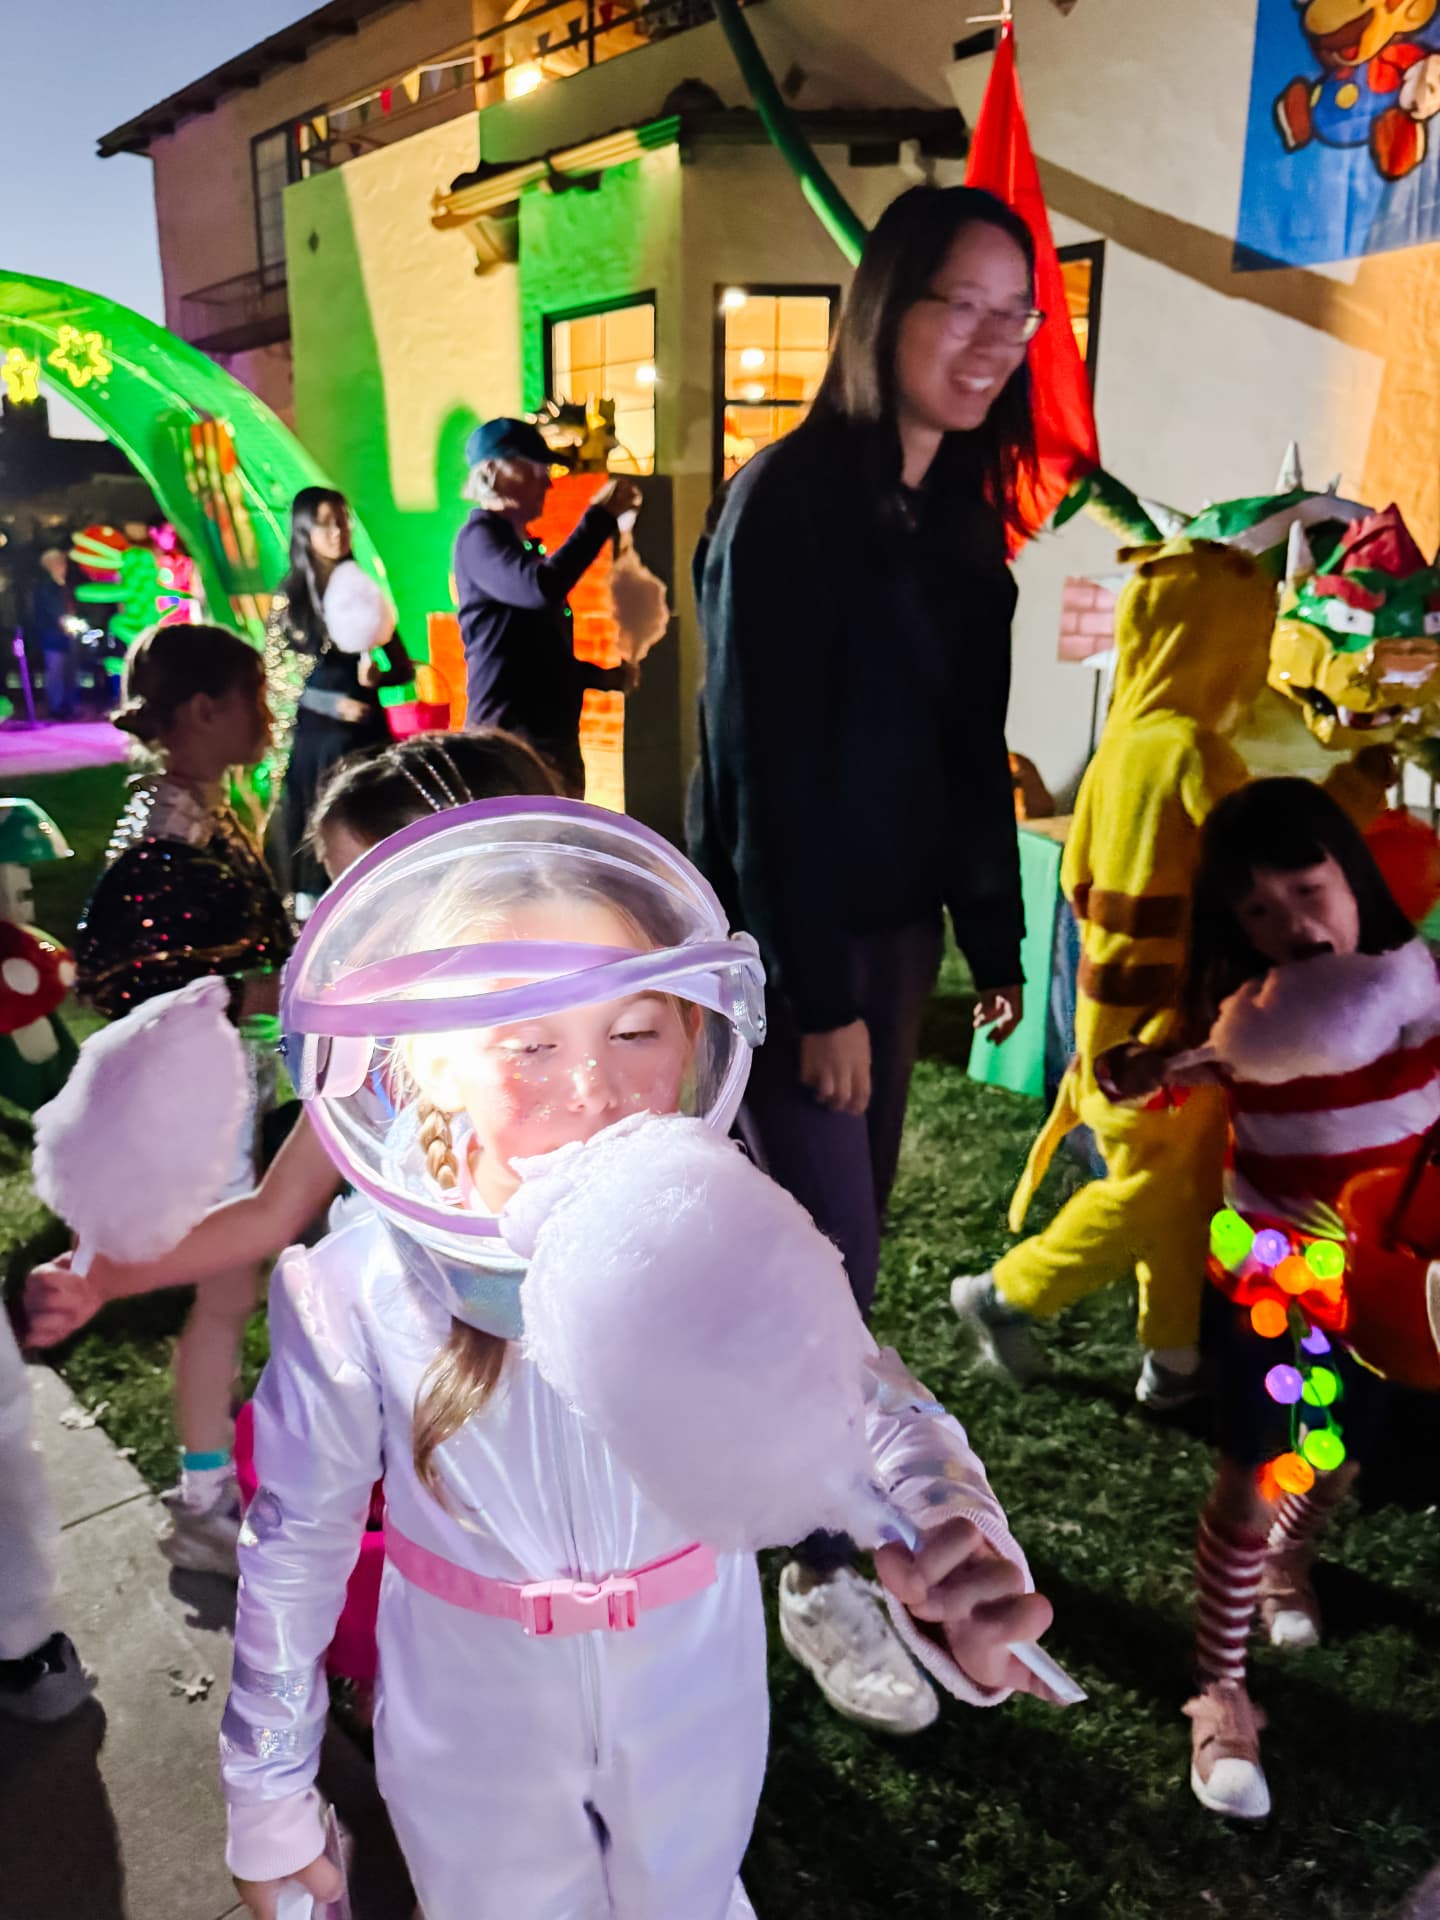
see it in motion

The finished costume on a real launch mission — helmet, jetpack flames and all.

The pastel astronaut costume in action, jetpack straps and felt flames included.

why this one is worth making

  • It's budget-friendly and mostly made from recycled materials.
  • The pastel, sparkly twist makes it stand out from every store-bought astronaut costume.
  • Building it is a real hands-on engineering project — cutting, fitting, assembling.
  • The colors and details are completely customizable to your child's favorites.
  • It keeps going long after Halloween as playroom space-mission dress-up.

what you'll need

Everything from the original build, grouped by the part of the costume it belongs to. Anything without a link is recycled or already in your craft drawer.

Spacesuit

Sew it, or skip ahead and embellish a jumpsuit you already own.

Shiny silver fabric or faux leather — product photo

Shiny silver fabric or faux leather

Cut into patches, stripes and elbow stars.

Pink or purple stretchy holographic fabric — product photo

Pink or purple stretchy holographic fabric

The main iridescent body of the spacesuit.

Pink straps and buckles — product photo

Pink straps and buckles

Makes the belt at the waist, plus the ribbed cuffs.

Felt star patches or iron-on stars — product photo

Felt star patches or iron-on stars

Glittery stars for the chest and sleeves.

Sewing machine and matching thread — product photo

Sewing machine and matching thread

White and light pink were used in the original build.

Substitute: Fabric glue if you'd rather not sew.

Holographic purple or pink boots — product photo

Holographic purple or pink boots

Children's Place space boots finish the look.

Helmet

Measure your child's head before you cut anything.

Large clear plastic globe or bubble — product photo

Large clear plastic globe or bubble

The helmet base — a large ornament globe works.

Pink shiny fabric for trim — product photo

Pink shiny fabric for trim

Softens every cut edge near your child's face.

Silver holographic fabric + cardboard — product photo

Silver holographic fabric + cardboard

Wraps the visor hinges and duct detail.

Dremel rotary tool — product photo

Dremel rotary tool

Cuts and sands the helmet opening and visor. Adults only.

Jetpack

Start saving bottles and boxes a couple of weeks ahead.

Two painted soda bottles forming the rocket jetpack

2 empty plastic soda bottles

The rocket boosters.

Recycled — no purchase needed
Cardboard box

Cardboard box

The flat pack base the bottles mount onto.

Recycled — no purchase needed
White spray paint — product photo

White spray paint

Light misted coats give the bottles a clean rocket finish.

Silver holographic fabric — product photo

Silver holographic fabric

Wraps the pack base and decorates the boosters.

Pink flexible fidget tubes

Pink flexible fidget tubes

The "oxygen hoses" coming out of the bottles.

Substitute: Glow in the dark fidget tubes (amzn.to/43UyXwW) for night-time glow.

Rocket flames

Felt in pastel pink, lavender and silver — product photo

Felt in pastel pink, lavender and silver

Layered into shooting-flame shapes.

Scissors

Scissors

For cutting the flame layers.

Use what you have
Shop the entire supplies list on Amazon

Some of the links above are Amazon affiliate links from the original GoodnightFox tutorial. If you buy through them, GoodnightFox may earn a small commission at no extra cost to you. Materials without a link are things you likely already have at home or in your recycling bin.

before you start

  • Measure firstMeasure your child's head before cutting the helmet. The opening needs roughly a 20–22" diameter circle on the bottom of the globe — measuring first saves you from cutting twice.
  • Adults onlyAll of the Dremel cutting and sanding on the acrylic globe is adult work. The tool gets hot and the acrylic melts and clumps the longer you cut.
  • Drying timeSpray painting the bottles needs light coats with 10–15 minutes of drying between each one, and the glued jetpack needs a stable spot to dry completely before you attach the straps.
  • Save your recyclingYou need two empty soda bottles and a cardboard box, so set them aside a week or two before costume night.
  • WorkspaceSpray paint outdoors or in a ventilated space, and keep a flat protected surface free for the hot glue and fabric work.
  • No-sew routeIf you'd rather not sew the jumpsuit, buy a metallic onesie or top and bottoms and add the embellishments with fabric glue instead.

the step-by-step build

Five phases, in the order they were actually built.

01

Create the Astronaut Suit

Metallic base, pink belt, stars and stripes.
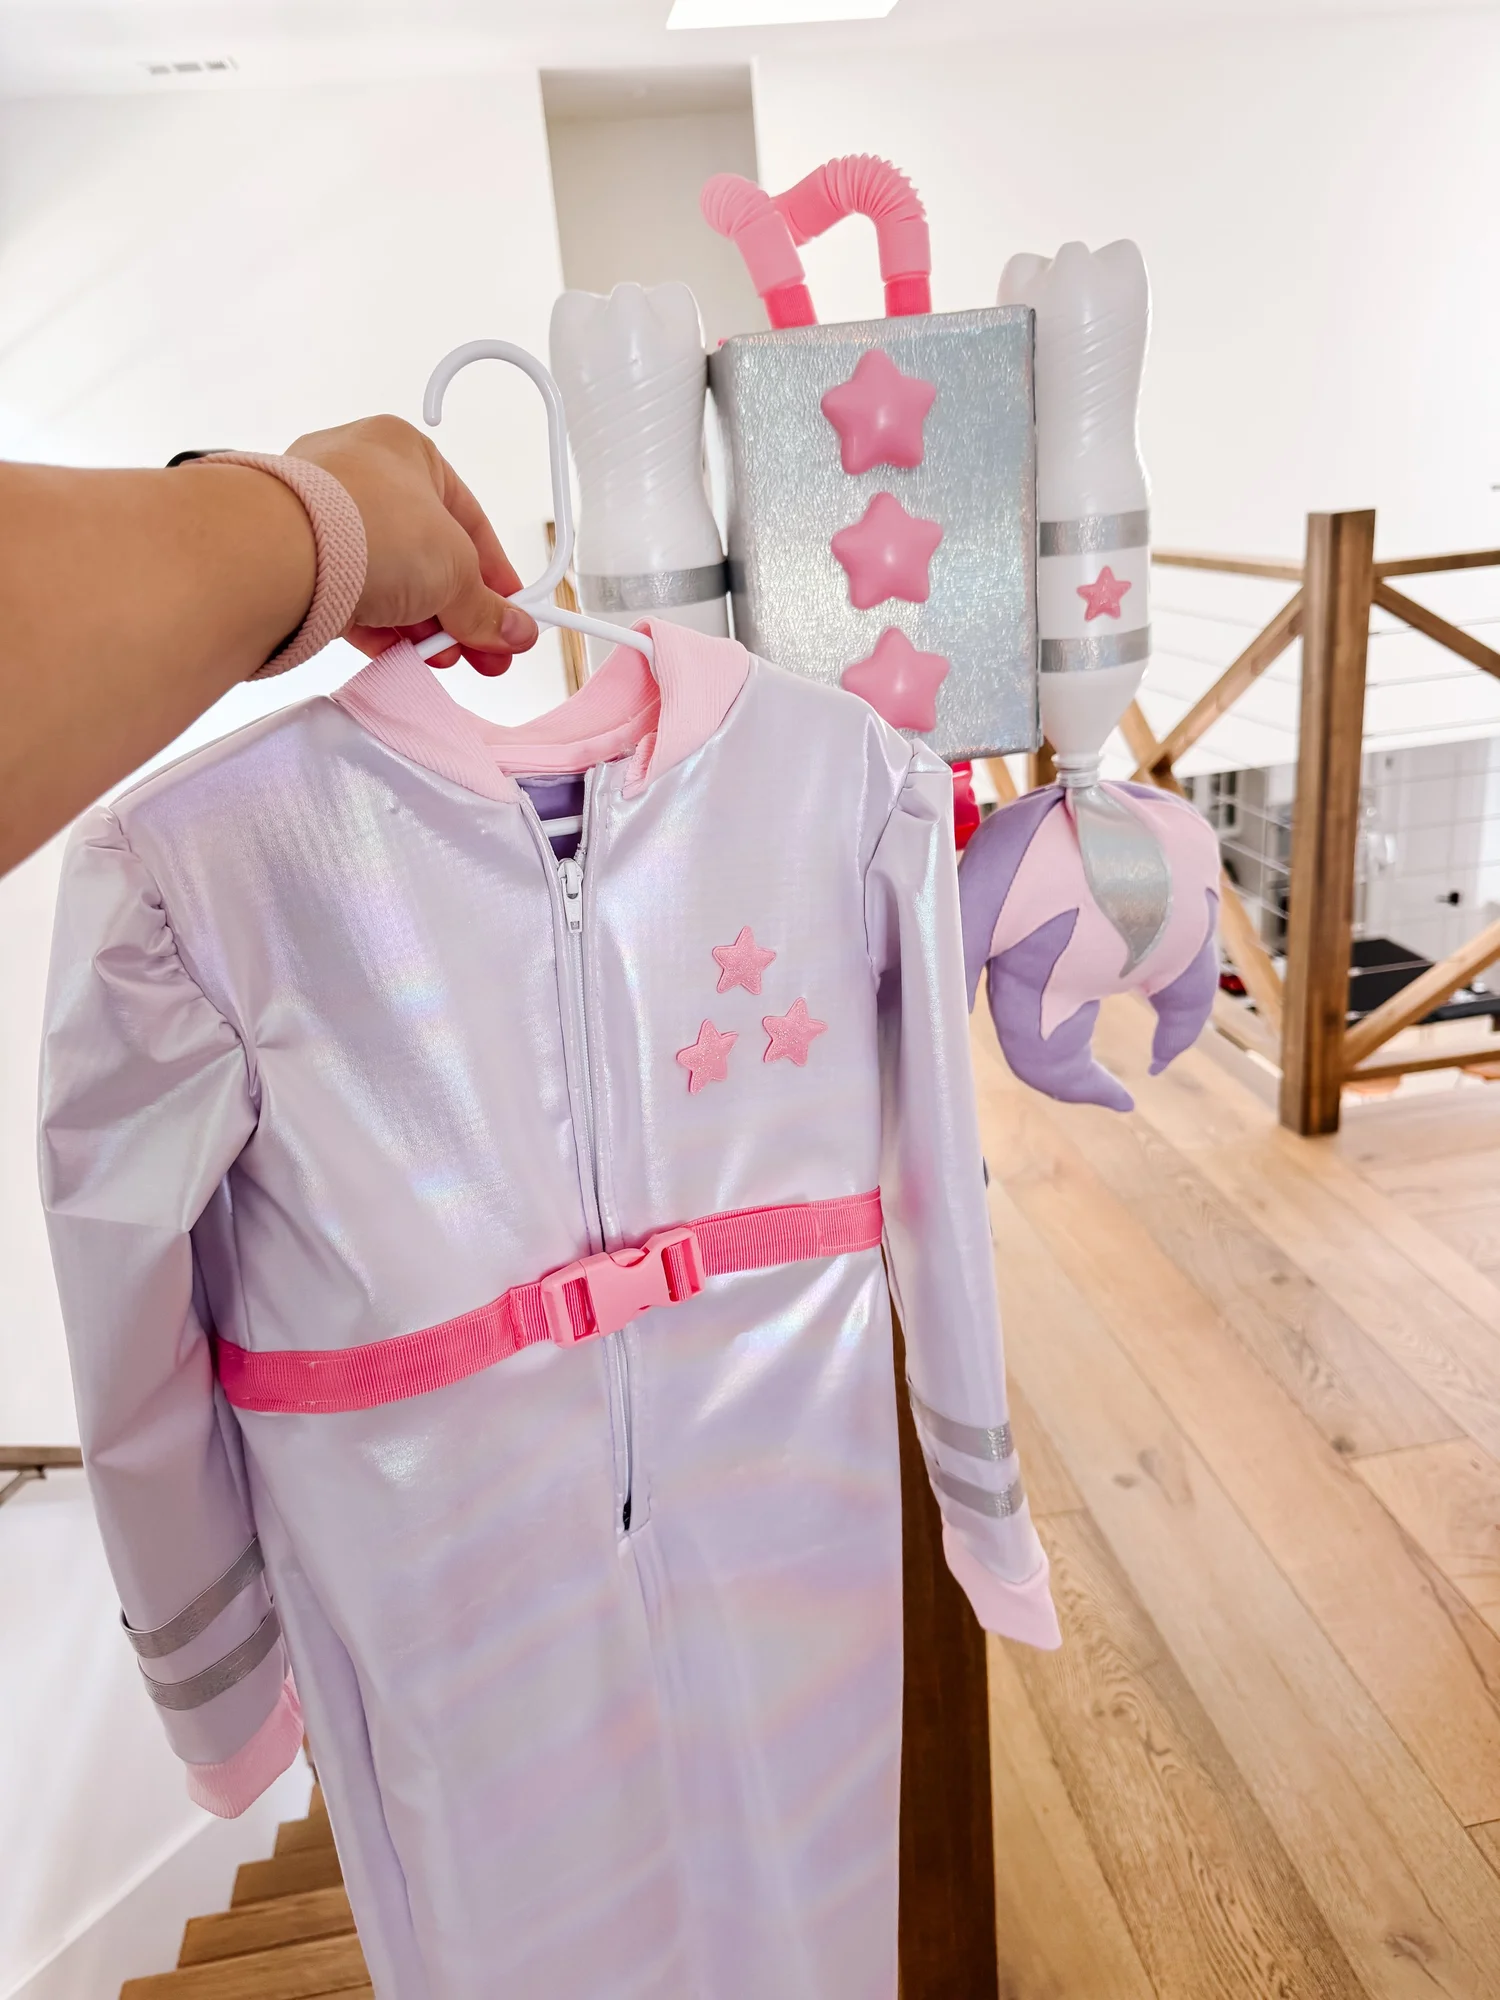
  1. Start with a shiny jumpsuit or metallic leggings and a matching top. Pastel iridescent fabric gives it the magical finish. Use a zipper onesie or jumpsuit sewing pattern — the original fused two fabrics together so the suit has a purple velvet lining for warmth on Halloween night. Cut the fabric, fuse it with an iron, then follow the pattern. To skip this step, buy a jumpsuit or metallic top and bottoms and just add the embellishments.
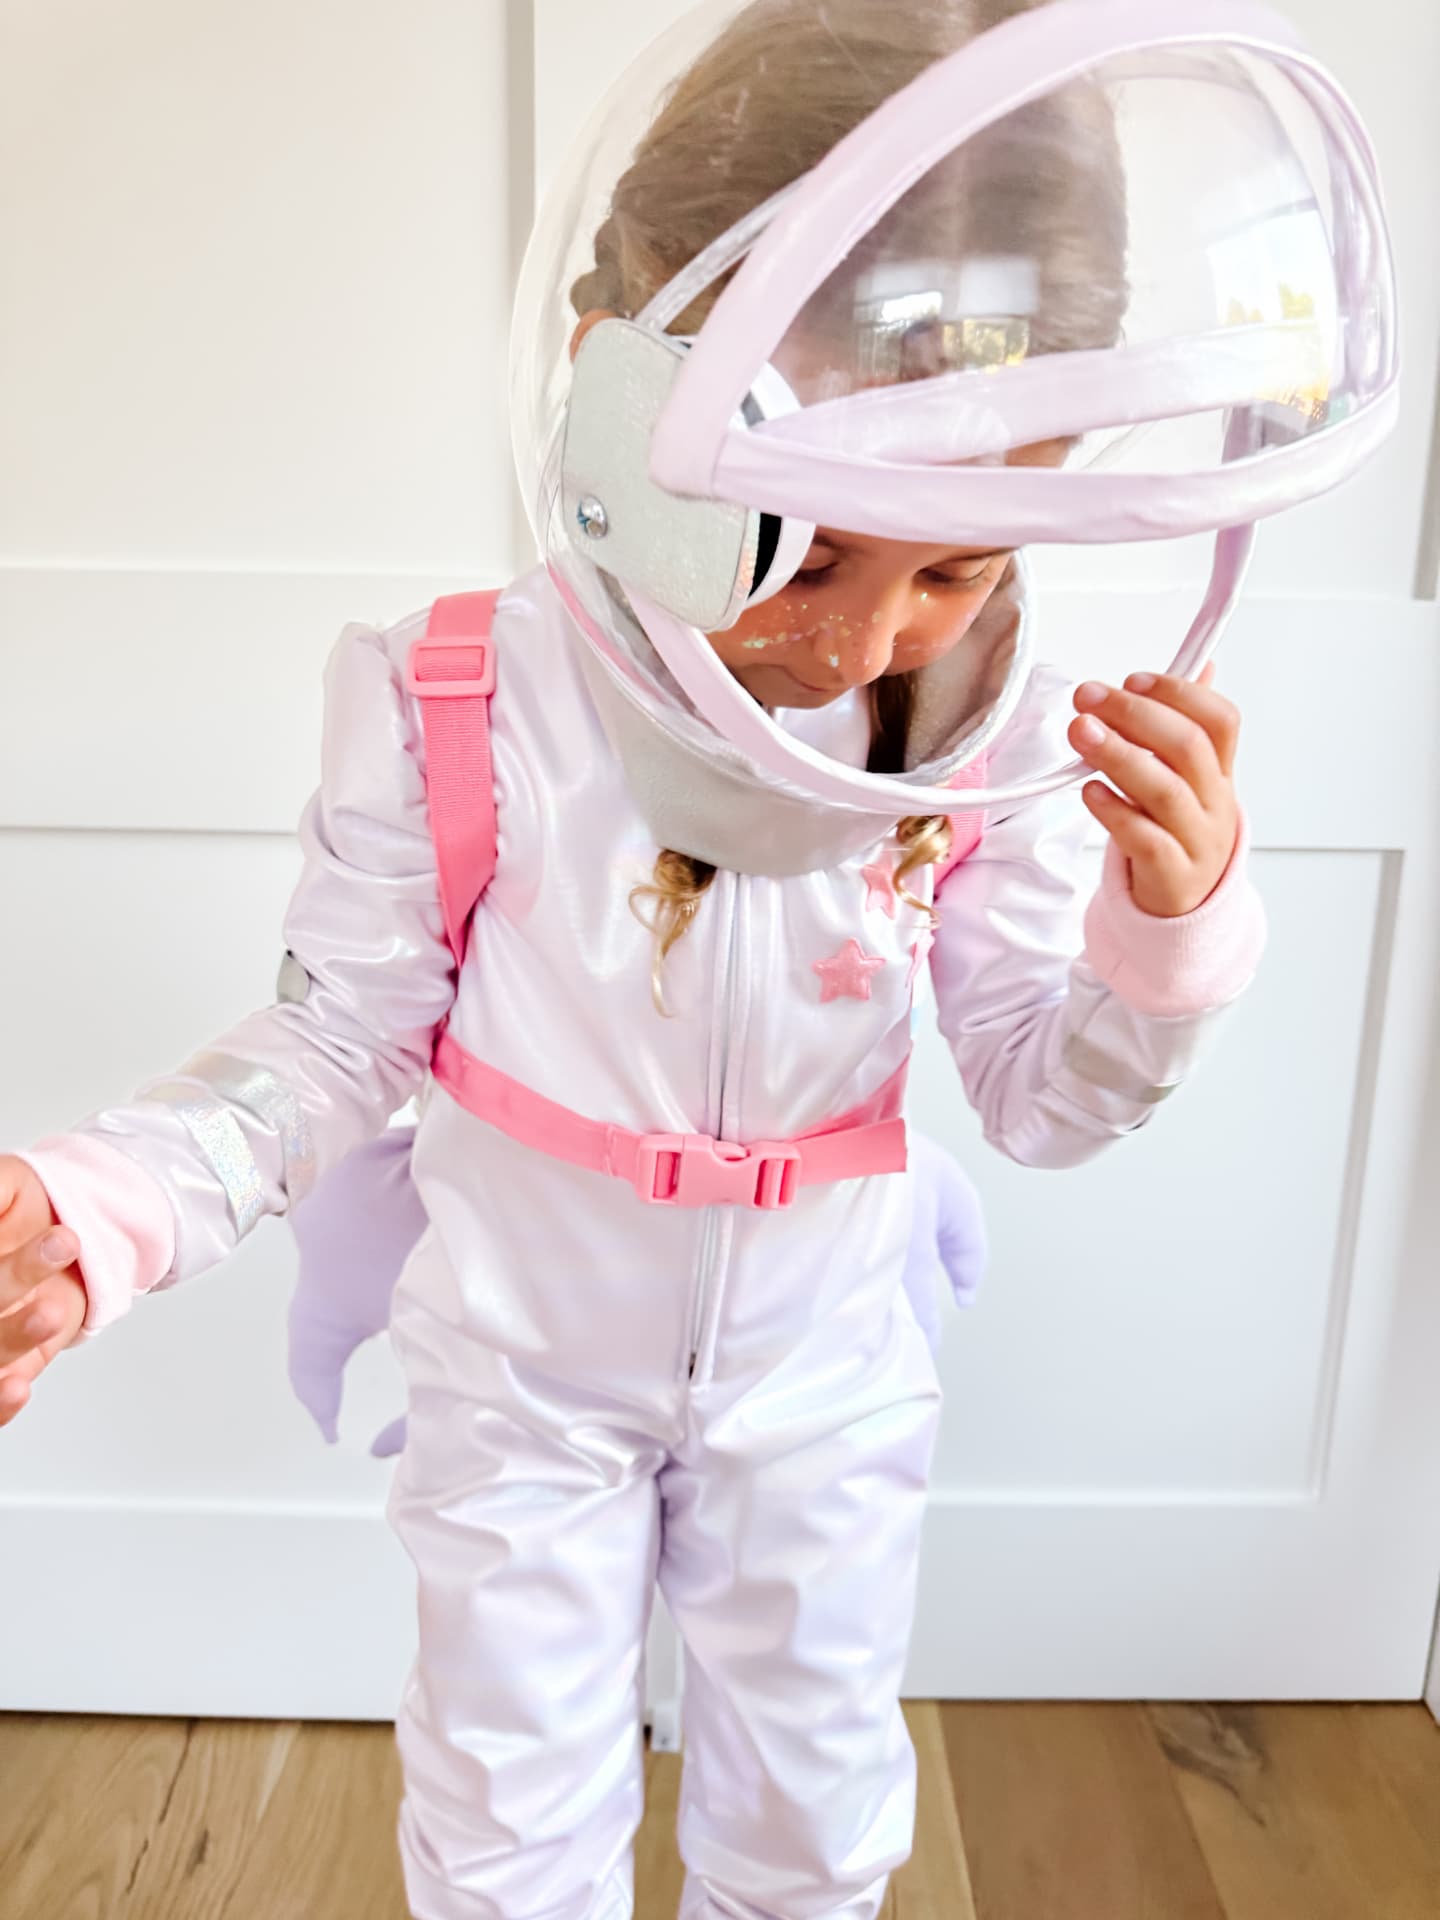
  2. Add a pink ribbon belt around the waist to break up the metallics. The buckle is non-functional but makes it look far more realistic. Vertical straps are optional — they were left off here because the jetpack already has vertical stripes.
  3. Attach star patches, or cut stars from pink felt and glue or sew them onto the chest and sleeves. Silver faux leather stars were added at the elbows, small pink glittery stars on the chest, and long strips of silver faux leather were cut for stripes on the sleeves and pants. A NASA logo works too.
Holographic fabricSilver faux leatherPink straps + bucklesStar patches
Holographic pastel spacesuit laid out during construction
Pink belt and buckle detail on the finished spacesuit

02

Make the Astronaut Helmet

The slowest part of the build — and the most impressive.
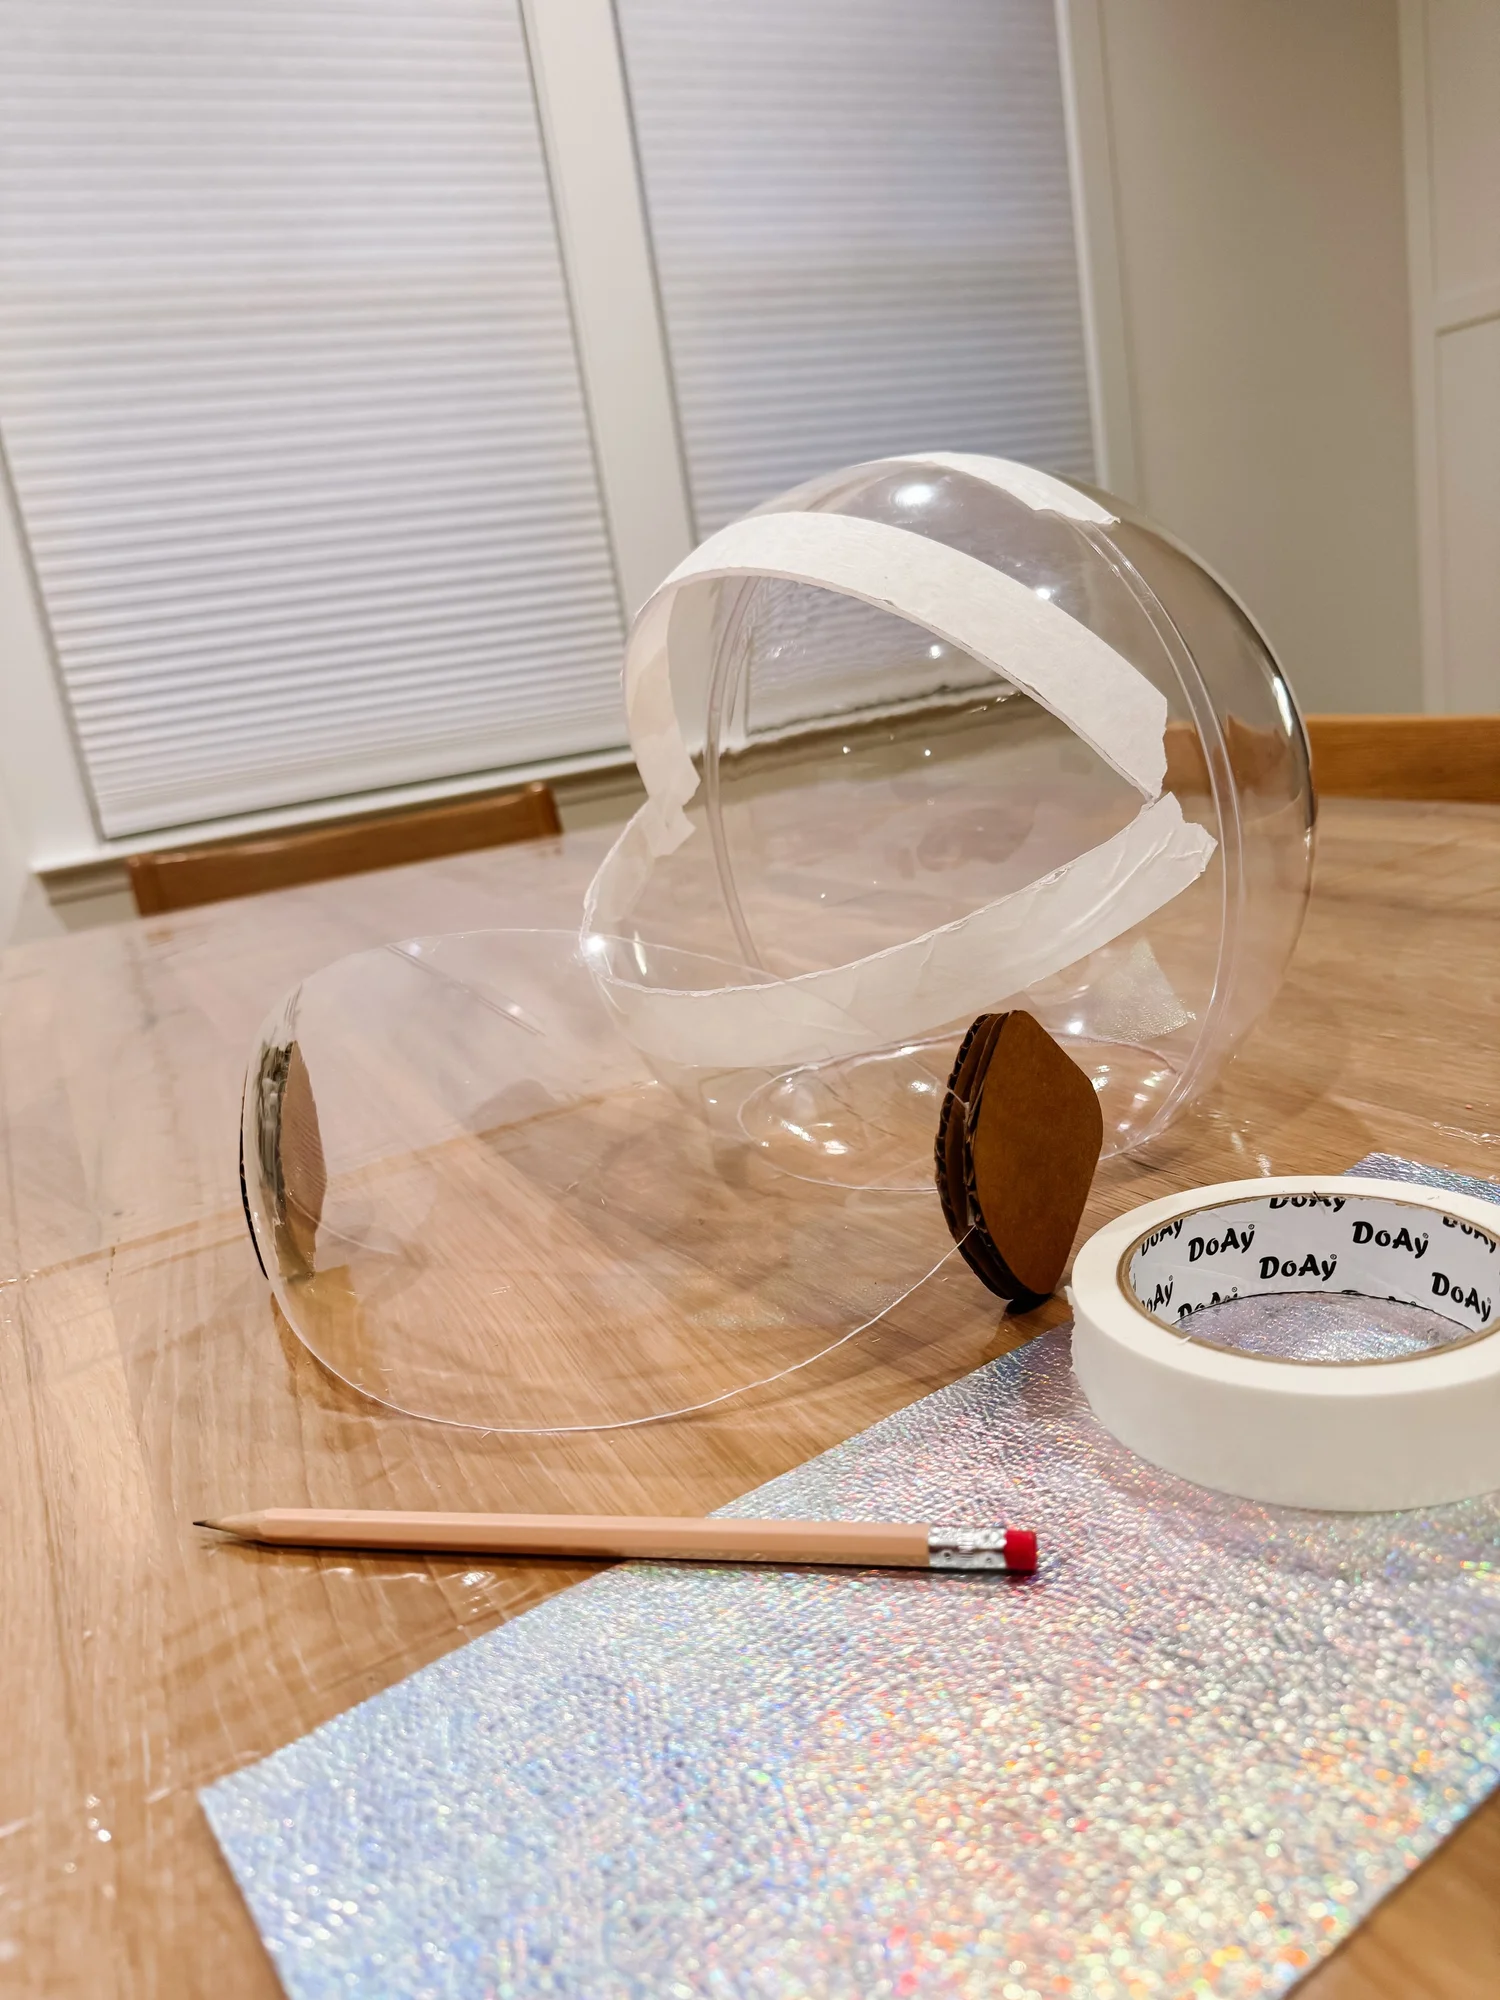
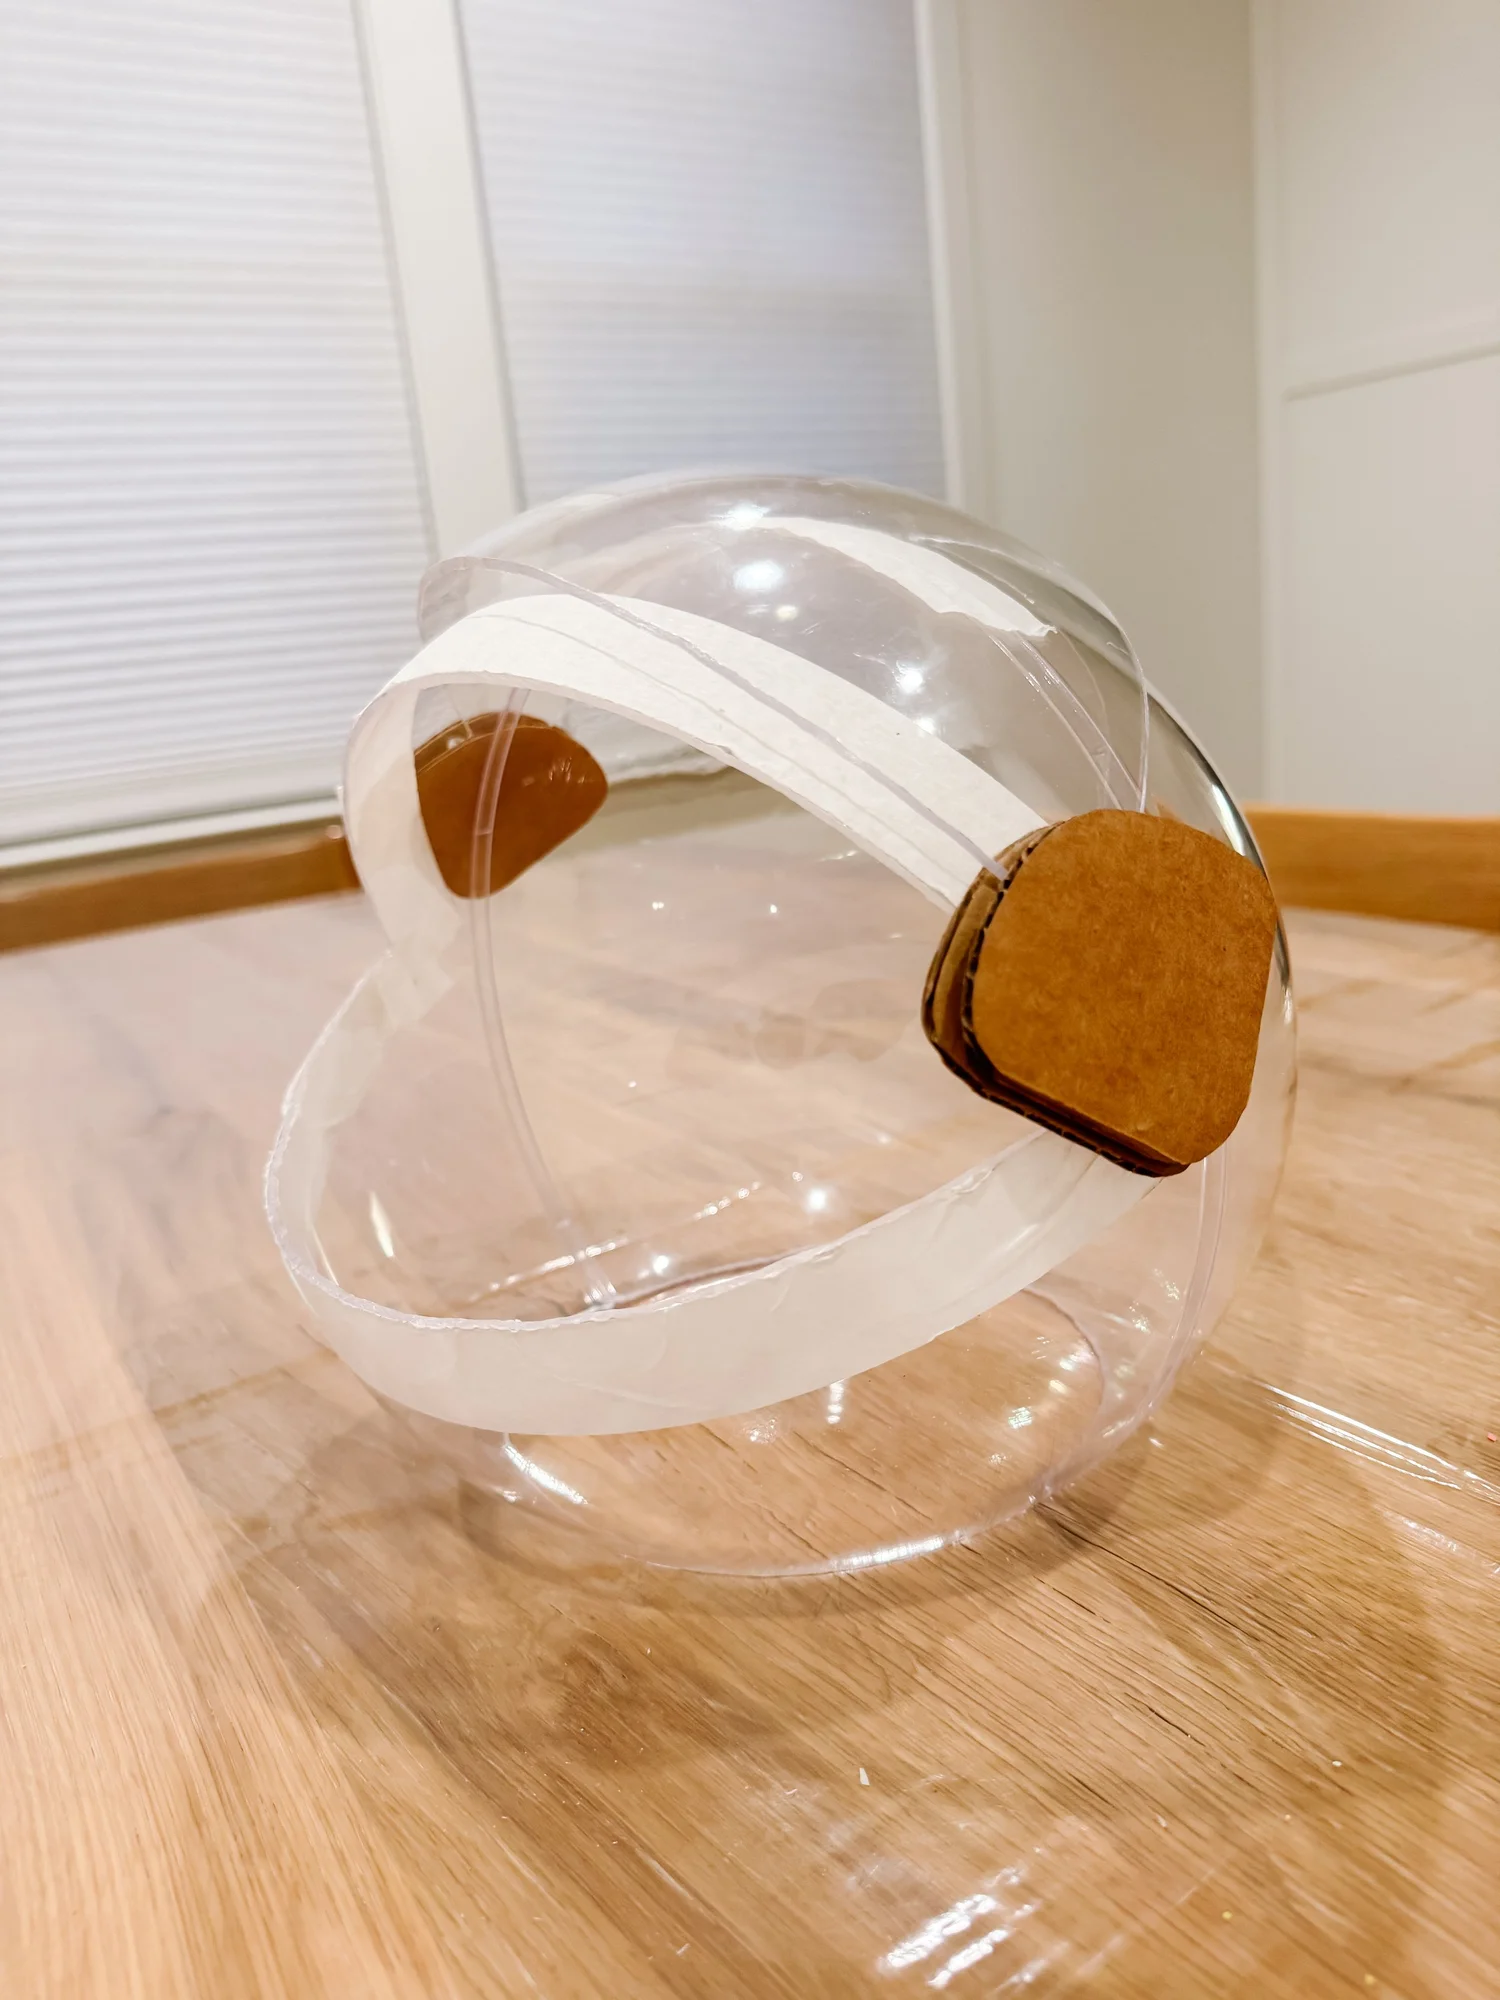
  1. Use a large clear globe or bubble as the helmet base. Mark your cut lines with masking tape or marker: a roughly 20–22" diameter circle on the bottom, plus the visor shape. Measure your child's head first — expanding the neck hole later takes far longer than cutting it right the first time. Pro tip: find a large dinner bowl that fits over your child's head, set it on the globe and trace it for a perfect circle.
  2. Cut lavender fabric strips to frame the helmet and secure them with hot glue or silver duct tape. Fold the stretchy fabric over twice and pull it tight. Smooth the glue as you go — clumps underneath show through. Do this on both the visor piece and the opening so no rough edges sit near your child's face.
  3. Make the visor hinges from cardboard and silver faux leather: cut a rounded triangular shape from a cardboard square, one for each side of the visor, cover both sides with the silver fabric and finish the edge with a thin strip.
  4. Attach the hinges with the two small bolts and nuts so the visor can pivot.
Clear globeDremelLavender + pink fabricCardboard hingesBolts and nuts
Clear globe marked with tape before cutting the helmet opening
Helmet with lavender fabric trim around the visor opening

03

Build the Rocket Jetpack

Two recycled soda bottles become the boosters.
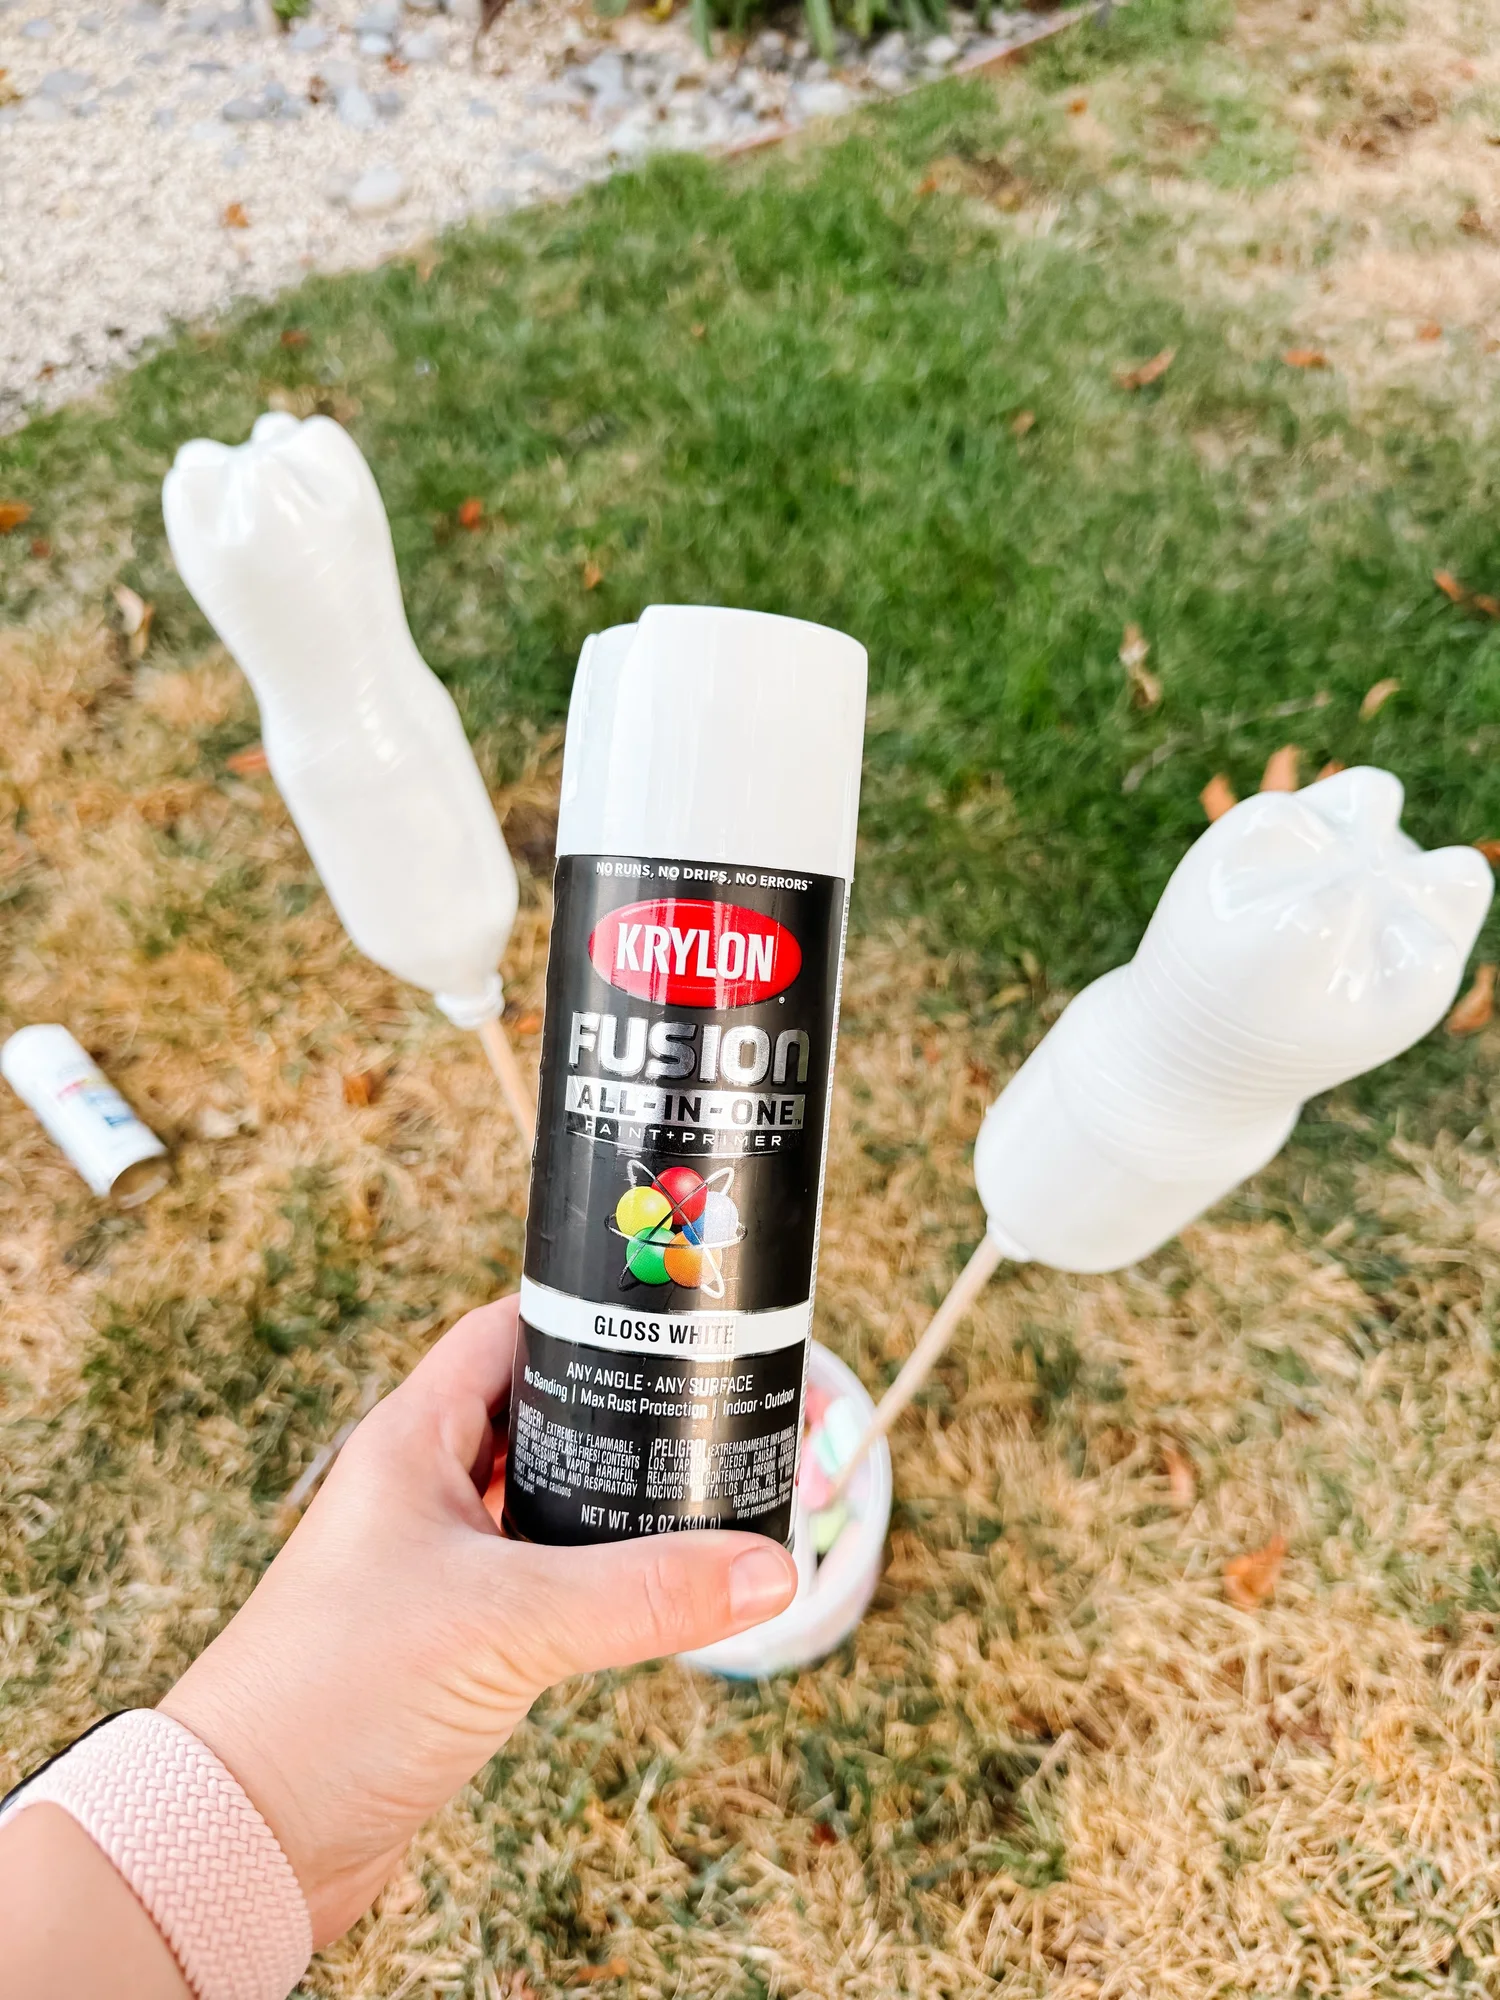
  1. Spray paint two empty soda bottles (silver, or white for a cleaner look — that's what was used here). Go slowly with light misted coats and let each one dry 10–15 minutes to avoid drips. A primer coat helps keep the paint from cracking. Wrapping them in metallic paper works too.
  2. Decorate the bottles with strips of holographic faux leather and small pink felt stars.
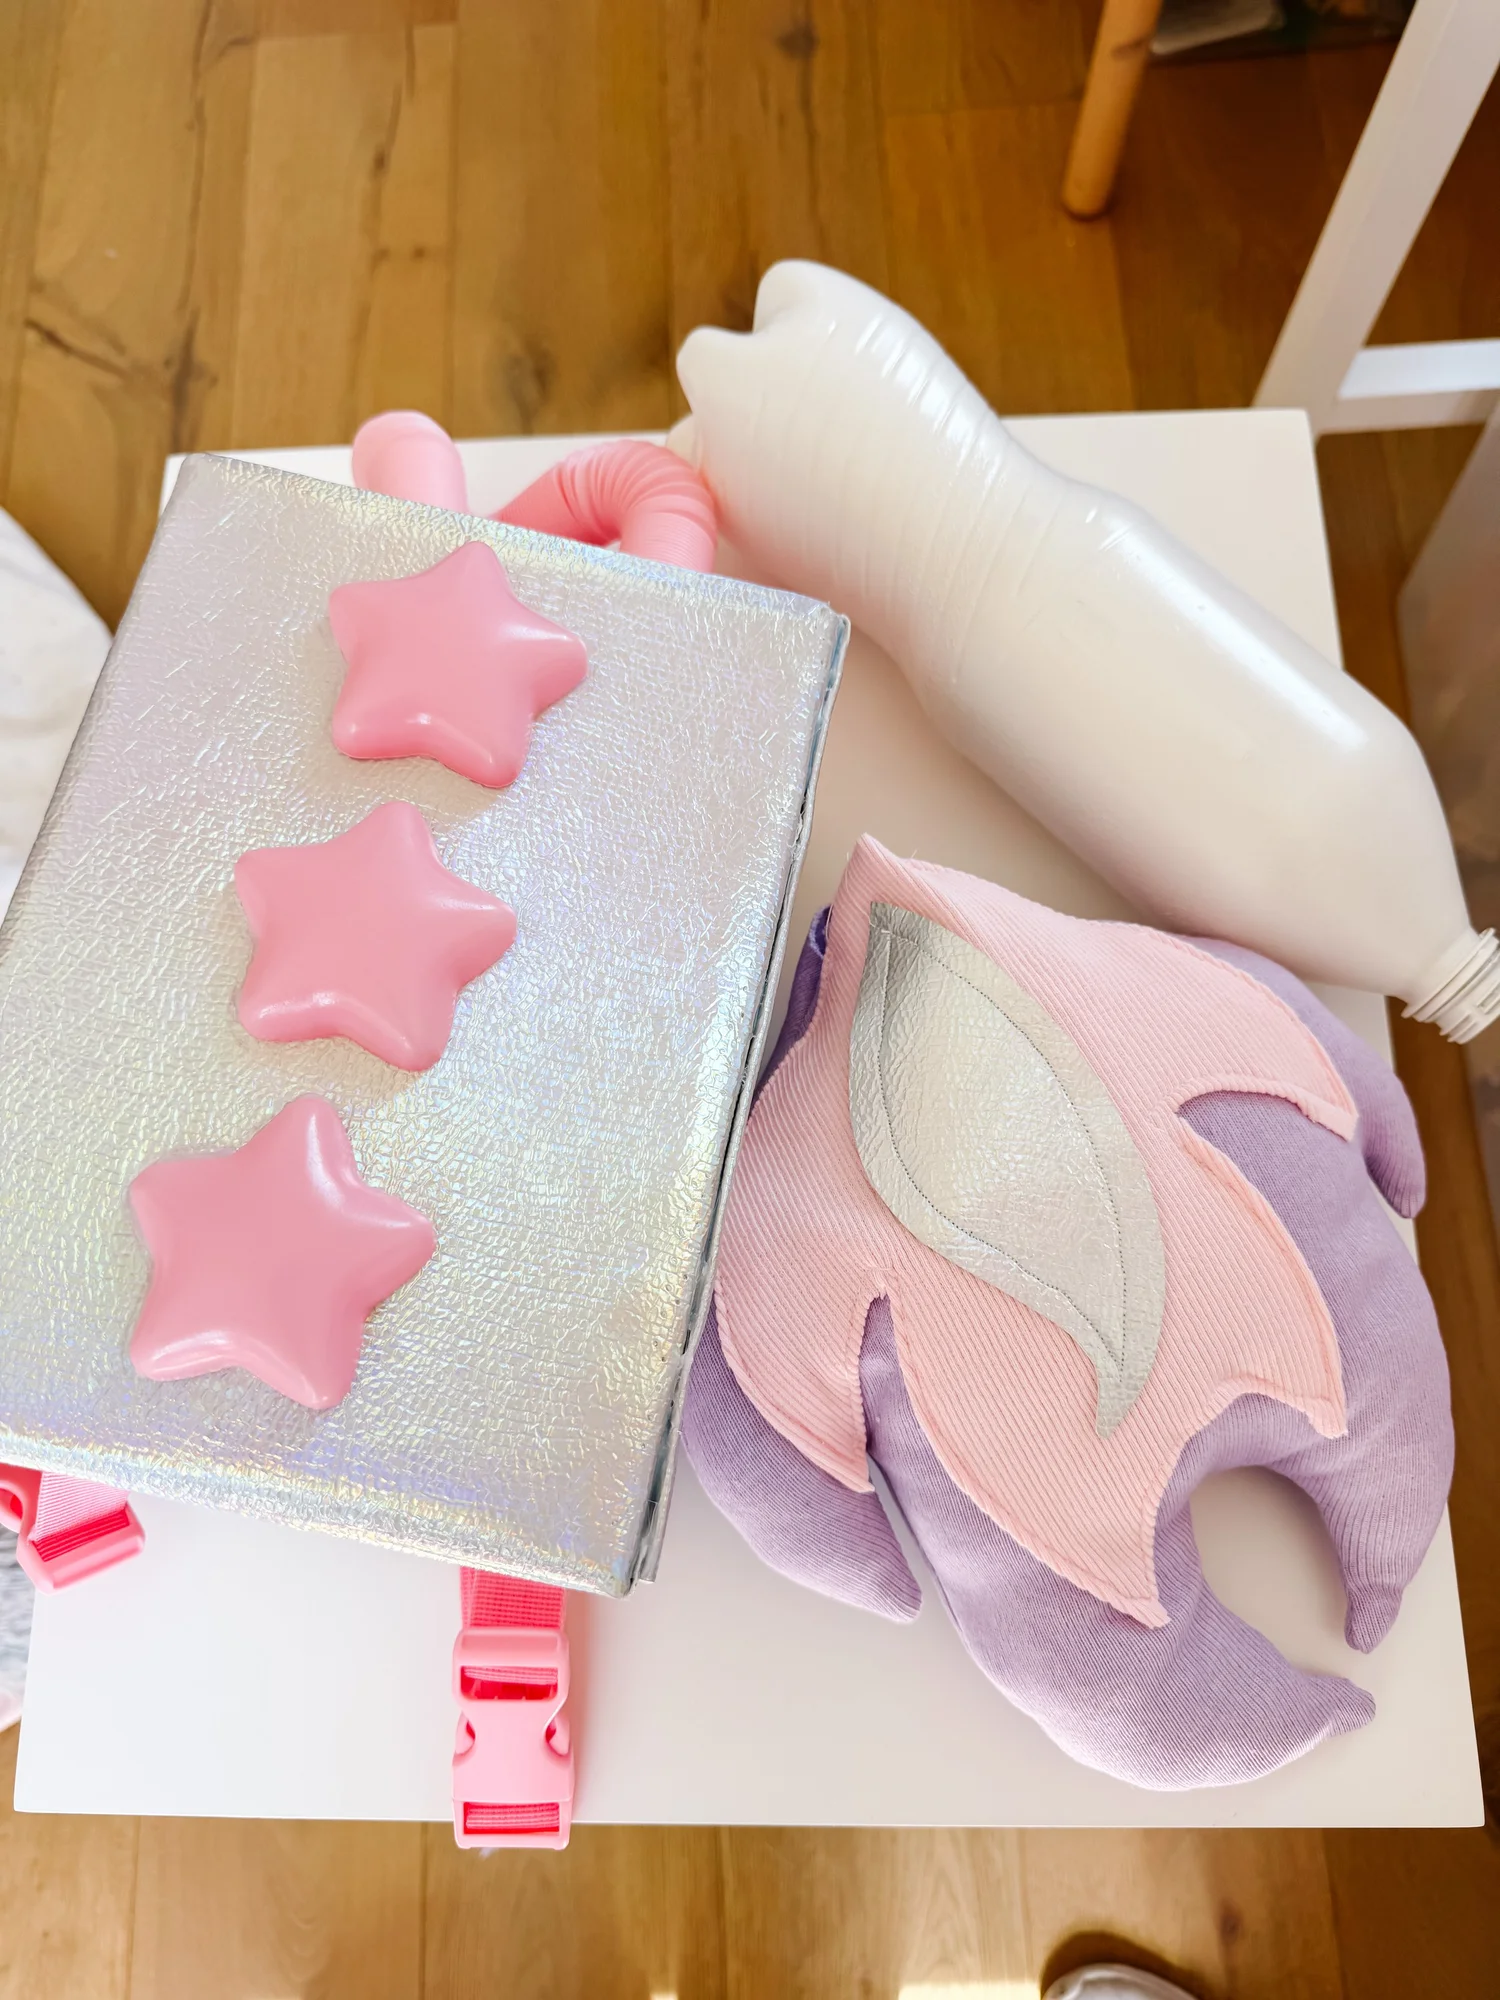
  3. Attach the bottles side by side onto a cardboard box wrapped in silver faux leather — this is the jetpack base. Use fabric glue or super glue, and set it somewhere stable to dry completely so the bottles stay secure.
  4. Glue pink bendy straws or tubing into the top of the bottles as "oxygen hoses." Pastel pink fidget tubes were used here; white or glow in the dark works too.
  5. Attach pink backpack straps so your child can wear it. Copy the looping pattern from a backpack you already own to make them adjustable — that way it still fits next year. Clippable claw buckles at the bottom make it easy to take on and off.
2 soda bottlesCardboard boxWhite spray paintFidget tubesPink straps
Painted soda bottles being assembled into a jetpack
Jetpack base wrapped in silver fabric with pink straps

04

Add the Rocket Flames

Layered felt flames that move when they run.
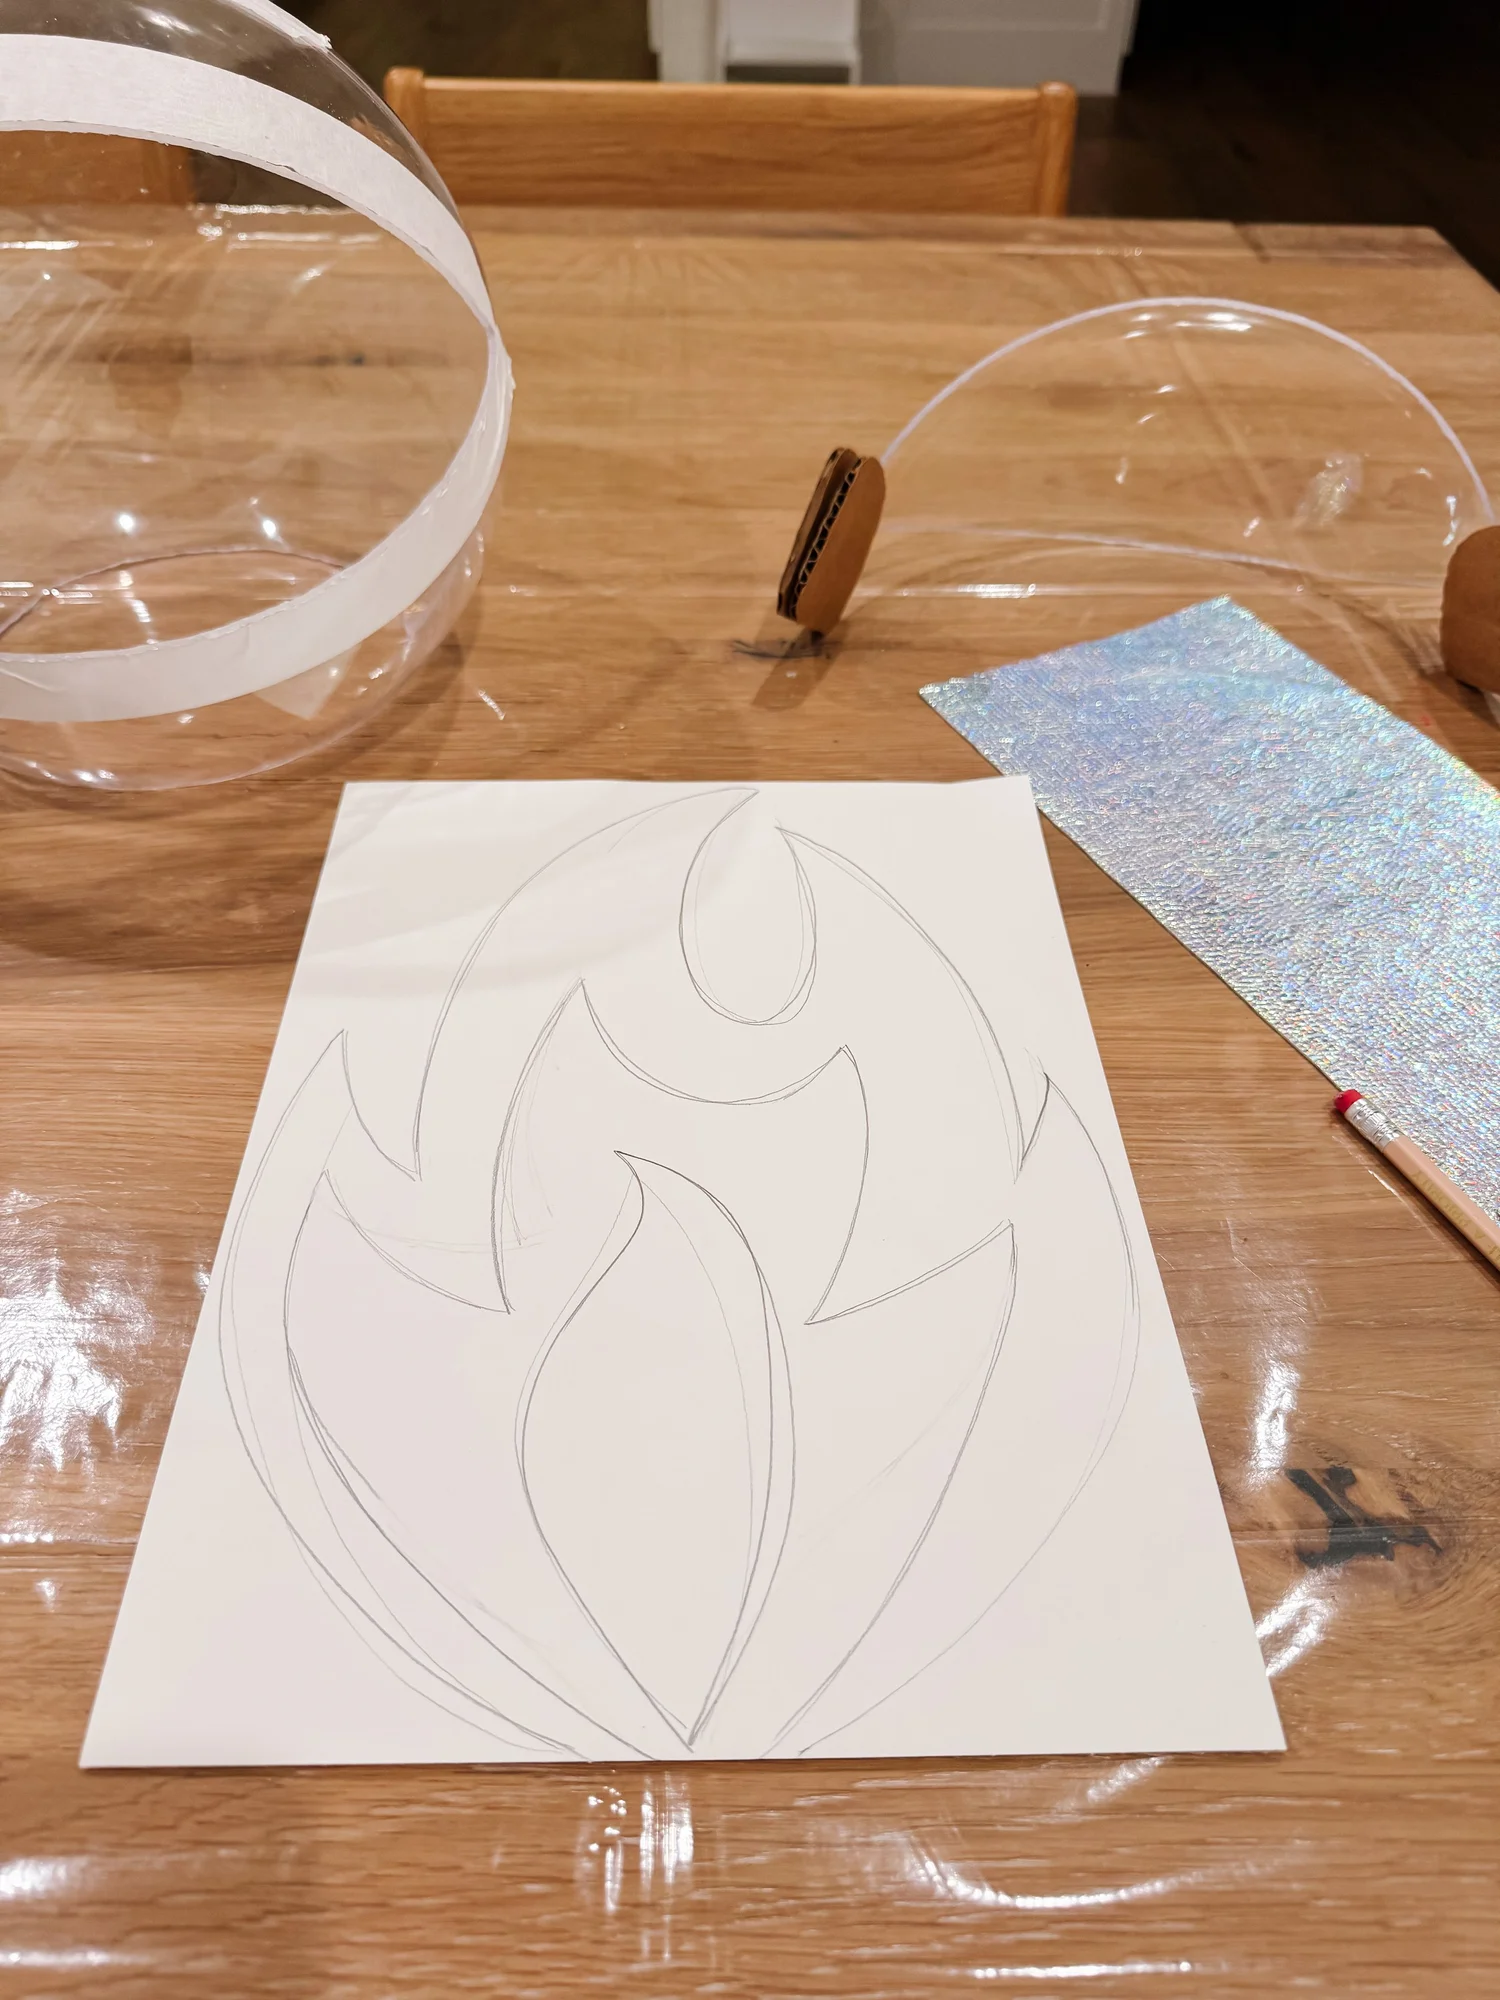
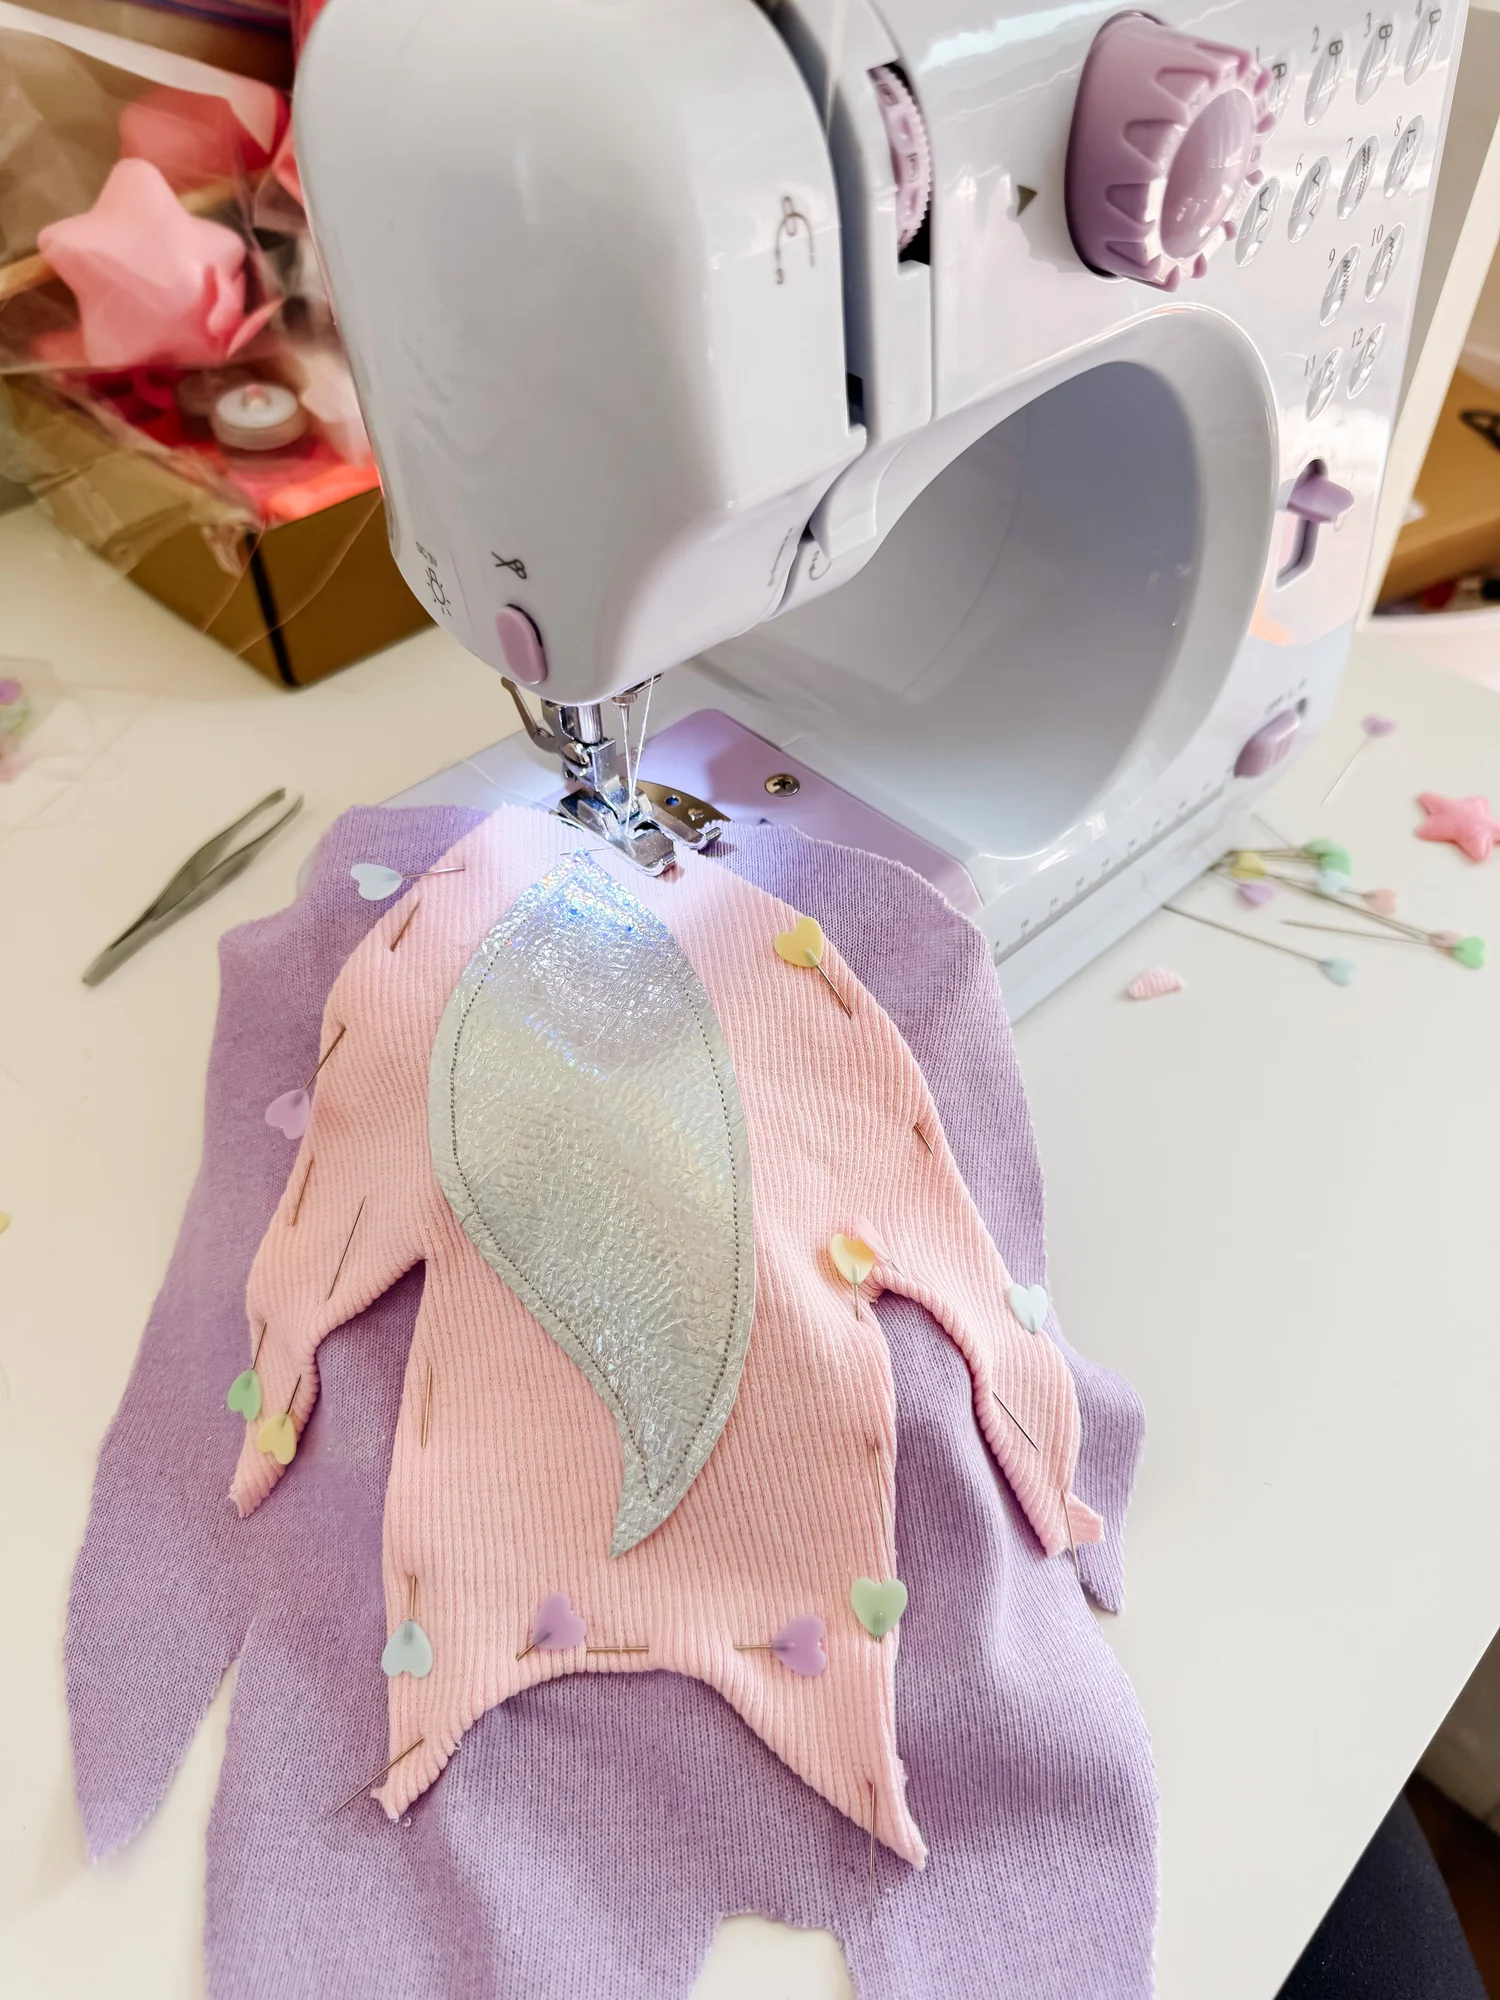
  1. Cut flame shapes from pink, lavender and silver felt, then layer them together for a "shooting flame" look.
  2. Glue the flames into the bottom opening of the soda bottles.
  3. Let them dangle freely so they move while your little astronaut blasts off.
Pastel feltScissorsFabric filler
Pastel felt flame shapes cut and layered
Finished rocket flames hanging from the jetpack bottles

05

Final Touches

Suit up and launch.

  1. Put on the sparkly suit, belt and helmet.
  2. Strap on the jetpack.
  3. Add silver gloves or holographic boots if you have them.
Child fully dressed in the finished astronaut costume

Special feature

the best part: the rocket jetpack

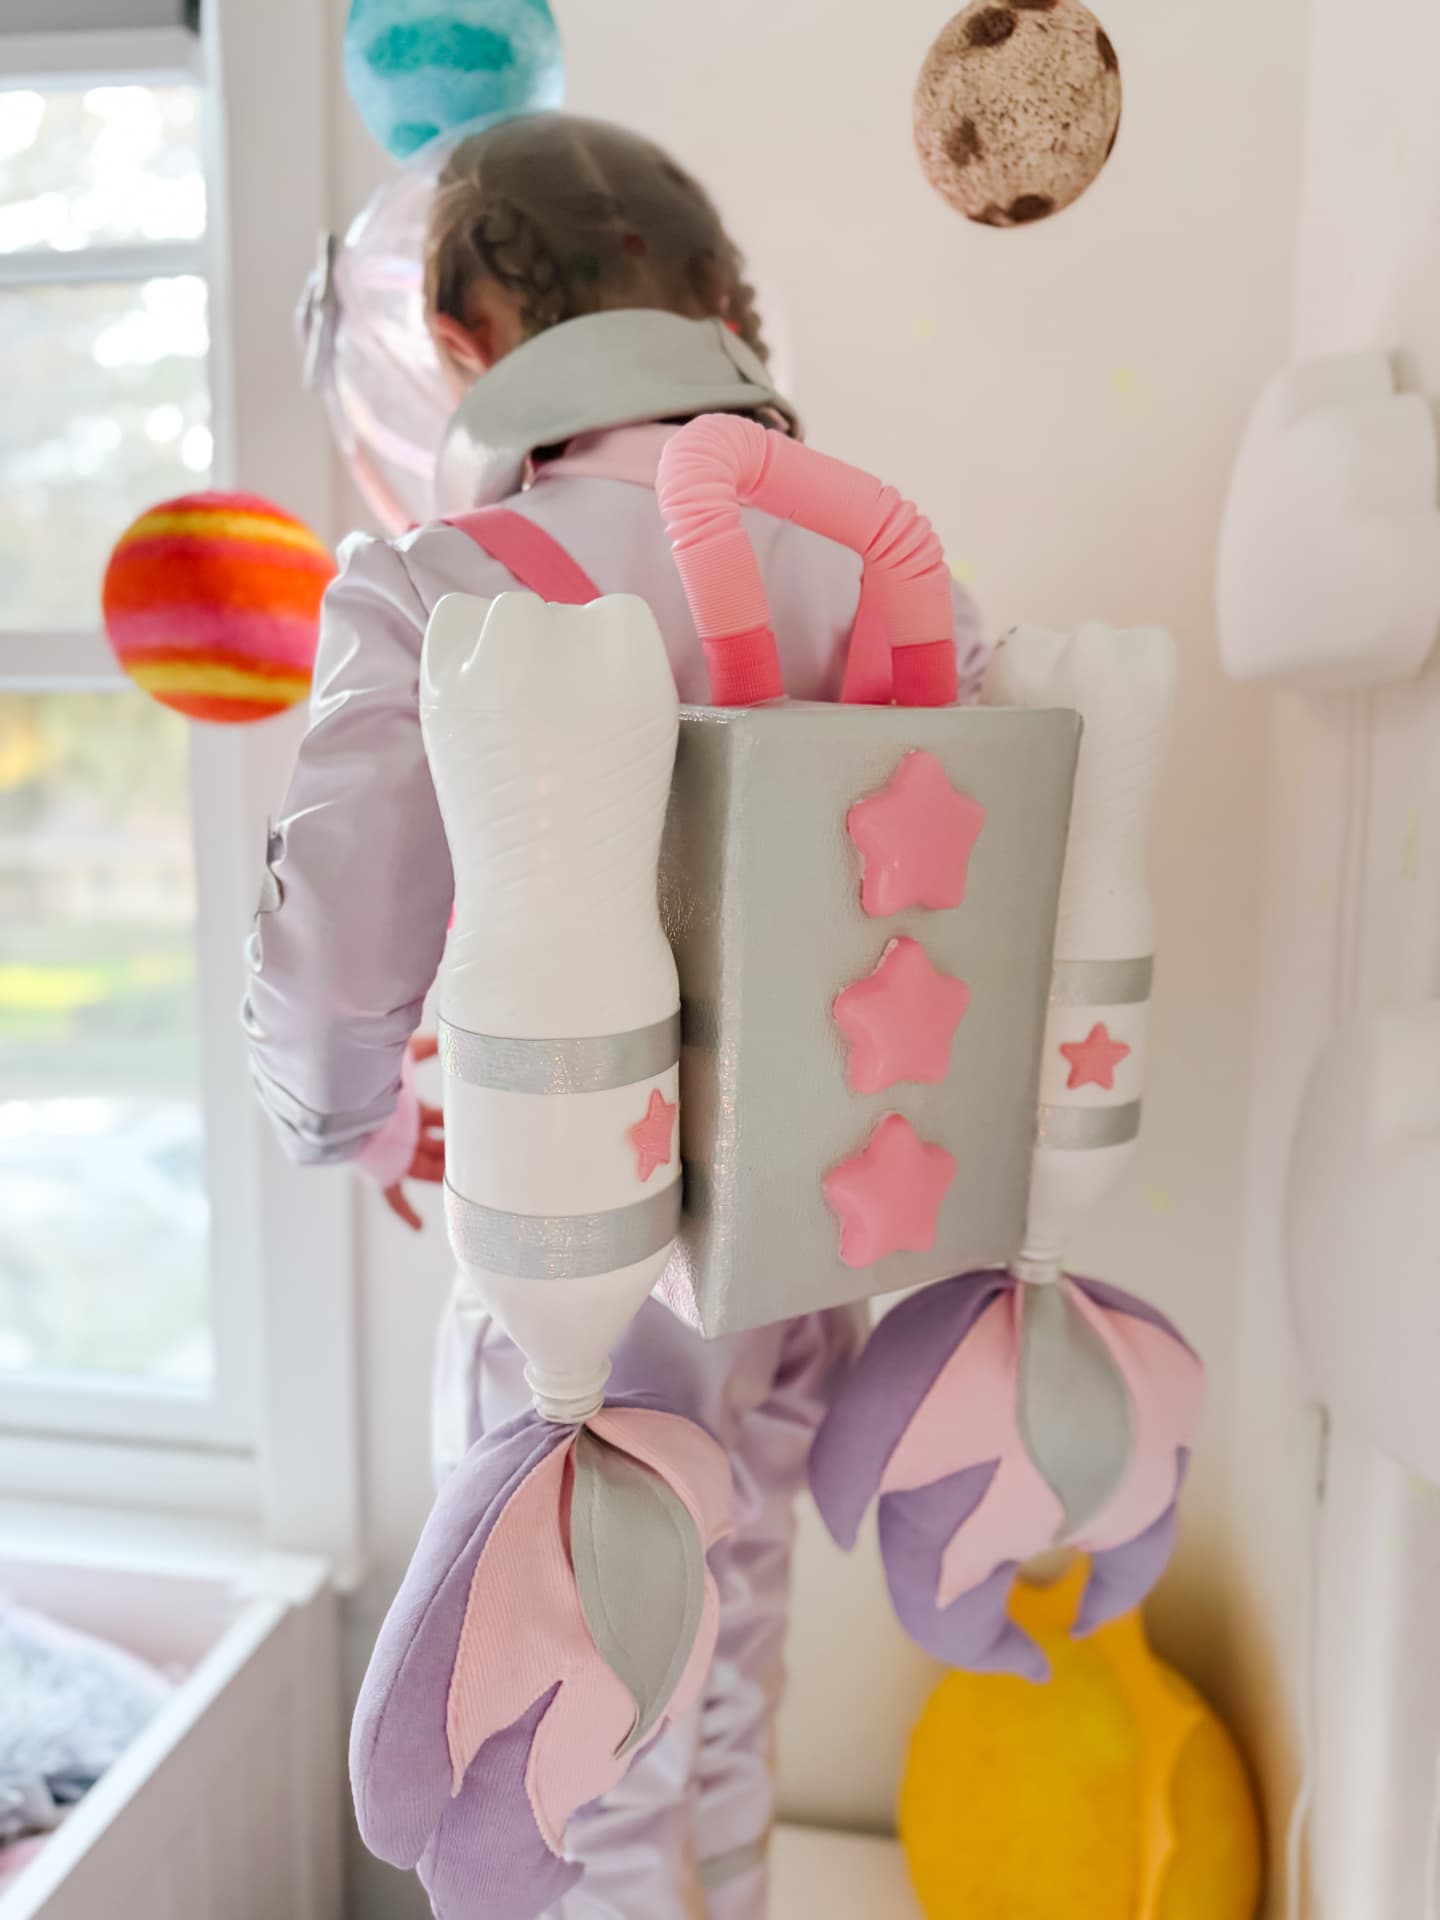
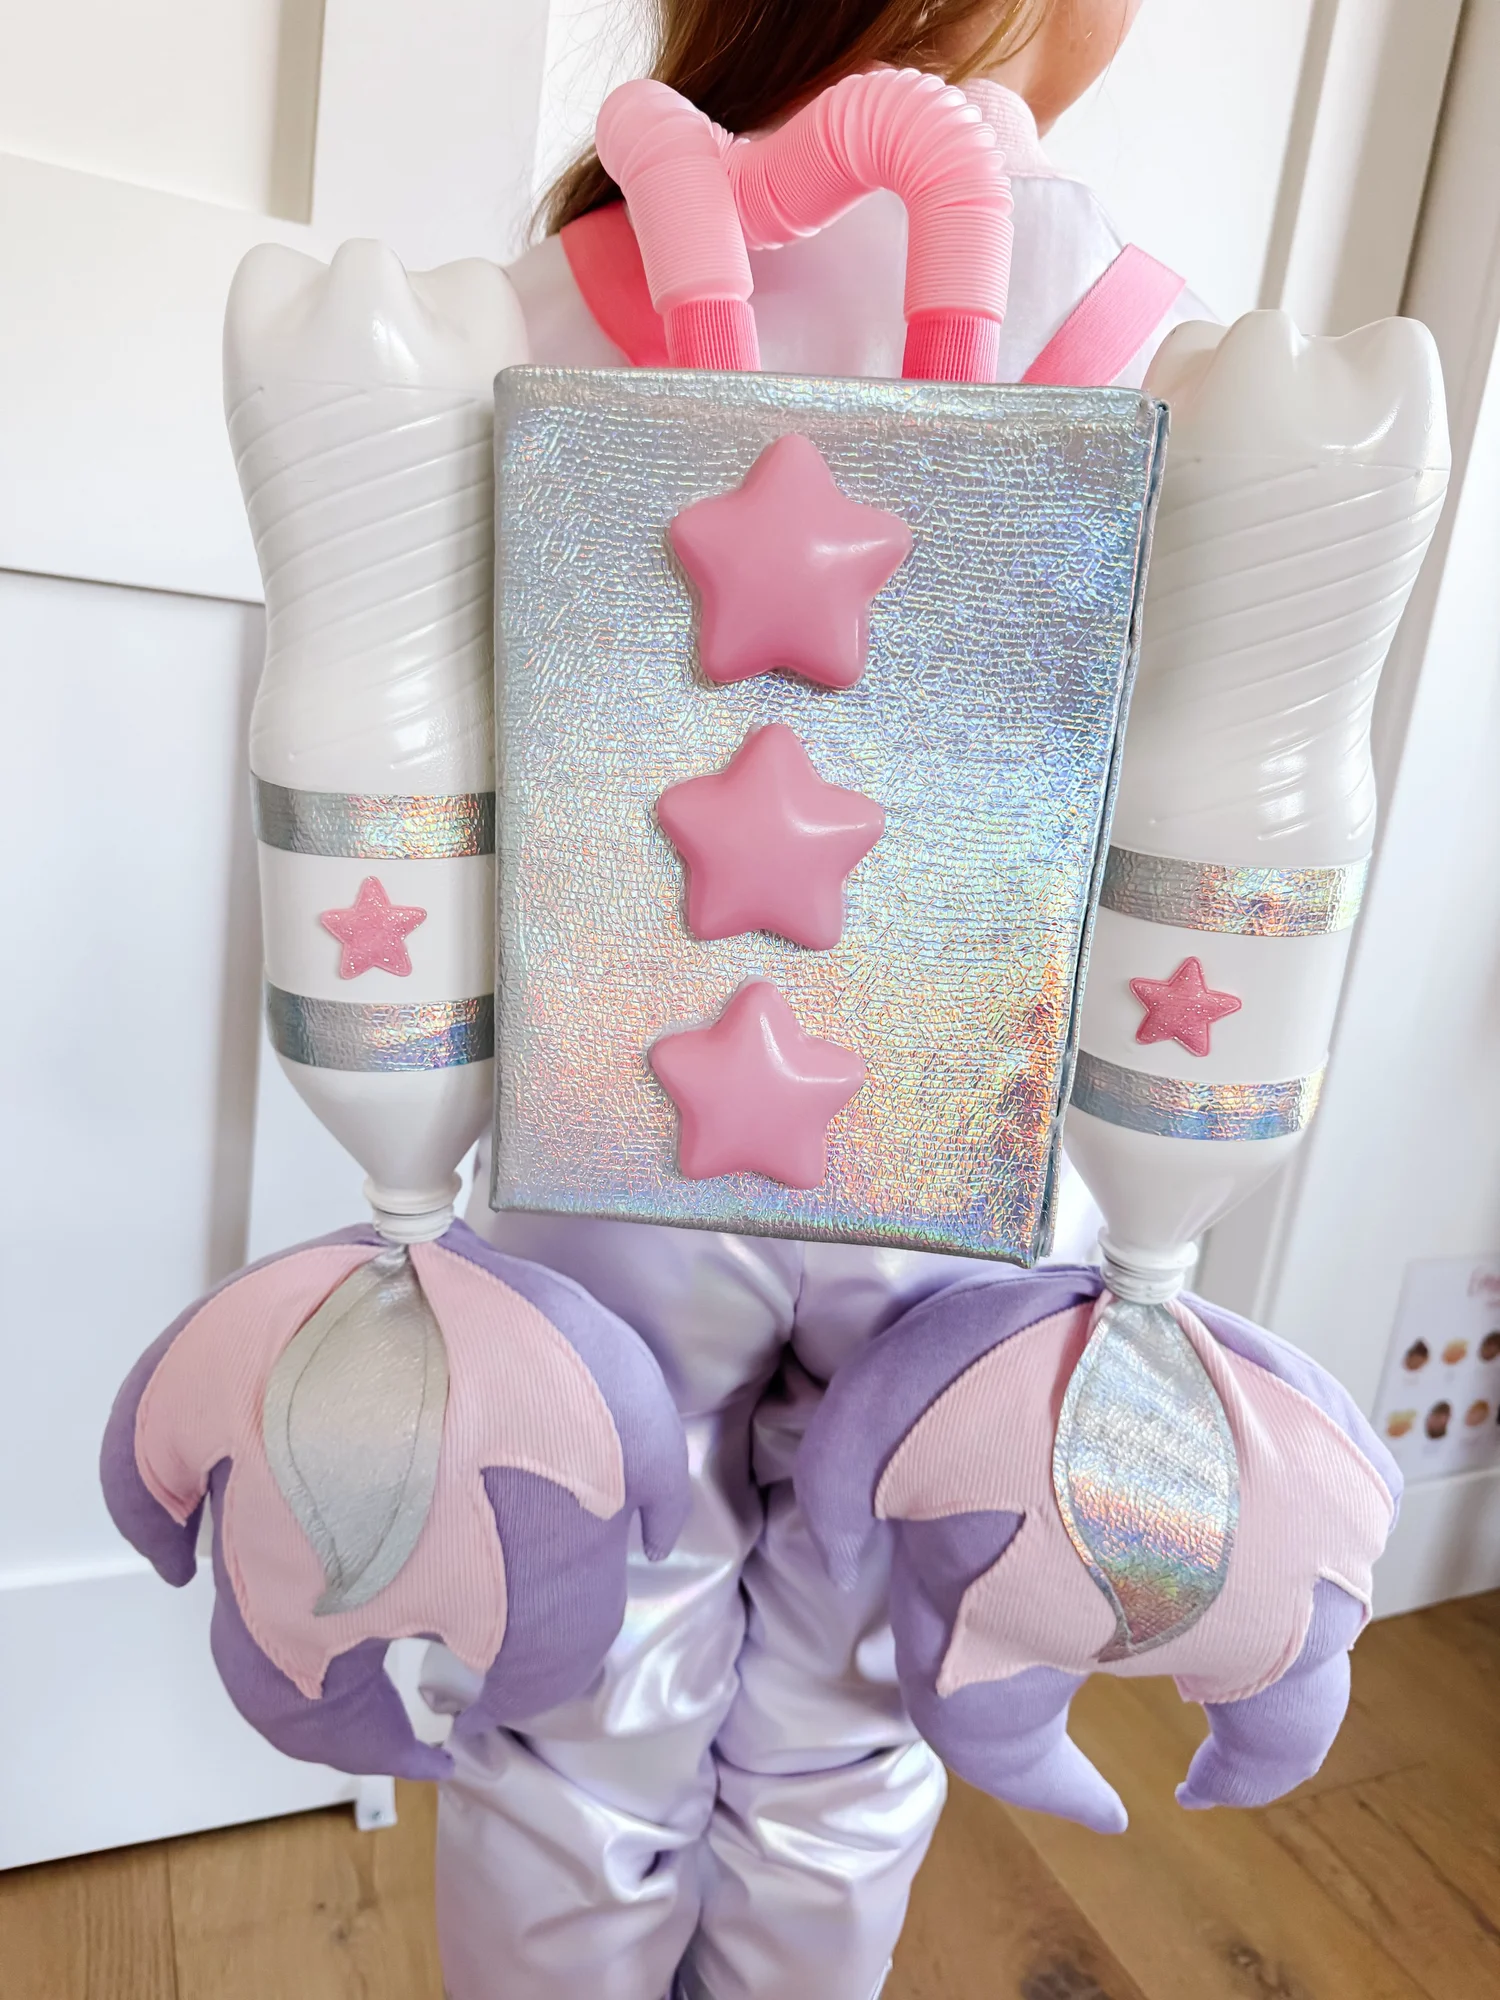
Two empty soda bottles, a cardboard box and a few pink straps turn into the piece every other kid asks about. The bottles get light coats of spray paint, holographic strips and felt stars, then mount side by side onto a fabric-wrapped cardboard base. Pastel fidget tubes plug into the tops as oxygen hoses, layered felt flames dangle from the bottoms, and battery LED string lights tucked inside the bottles make the whole thing glow after dark.

  • Recycled bottles + a cardboard box do all the structural work
  • Adjustable backpack straps copied from a real backpack, so it fits for years
  • Claw buckles at the bottom make it easy to take on and off
  • LED string lights inside the bottles for a night-time glow
Close-up of the handmade rocket jetpack with pink tubing and felt flames
Pink flexible fidget tubes

Pink flexible fidget tubes

The oxygen hoses on top of the boosters.

a few goodnightfox notes

the costume doesn't have to end on Halloween

Three easy ways the original tutorial keeps the space learning going.

Imaginative play

Space mission pretend play

Have your child pretend they're heading out on a mission. Ask where they're travelling and what they discover along the way.

STEM

Planet sorting game

Cut out paper planets and sort them by size, color, or order from the sun. Talk about rockets, planets and how astronauts live in space.

Movement

Astronaut training course

Build a simple obstacle course and call it astronaut training — low gravity, moon rocks and space tunnels.
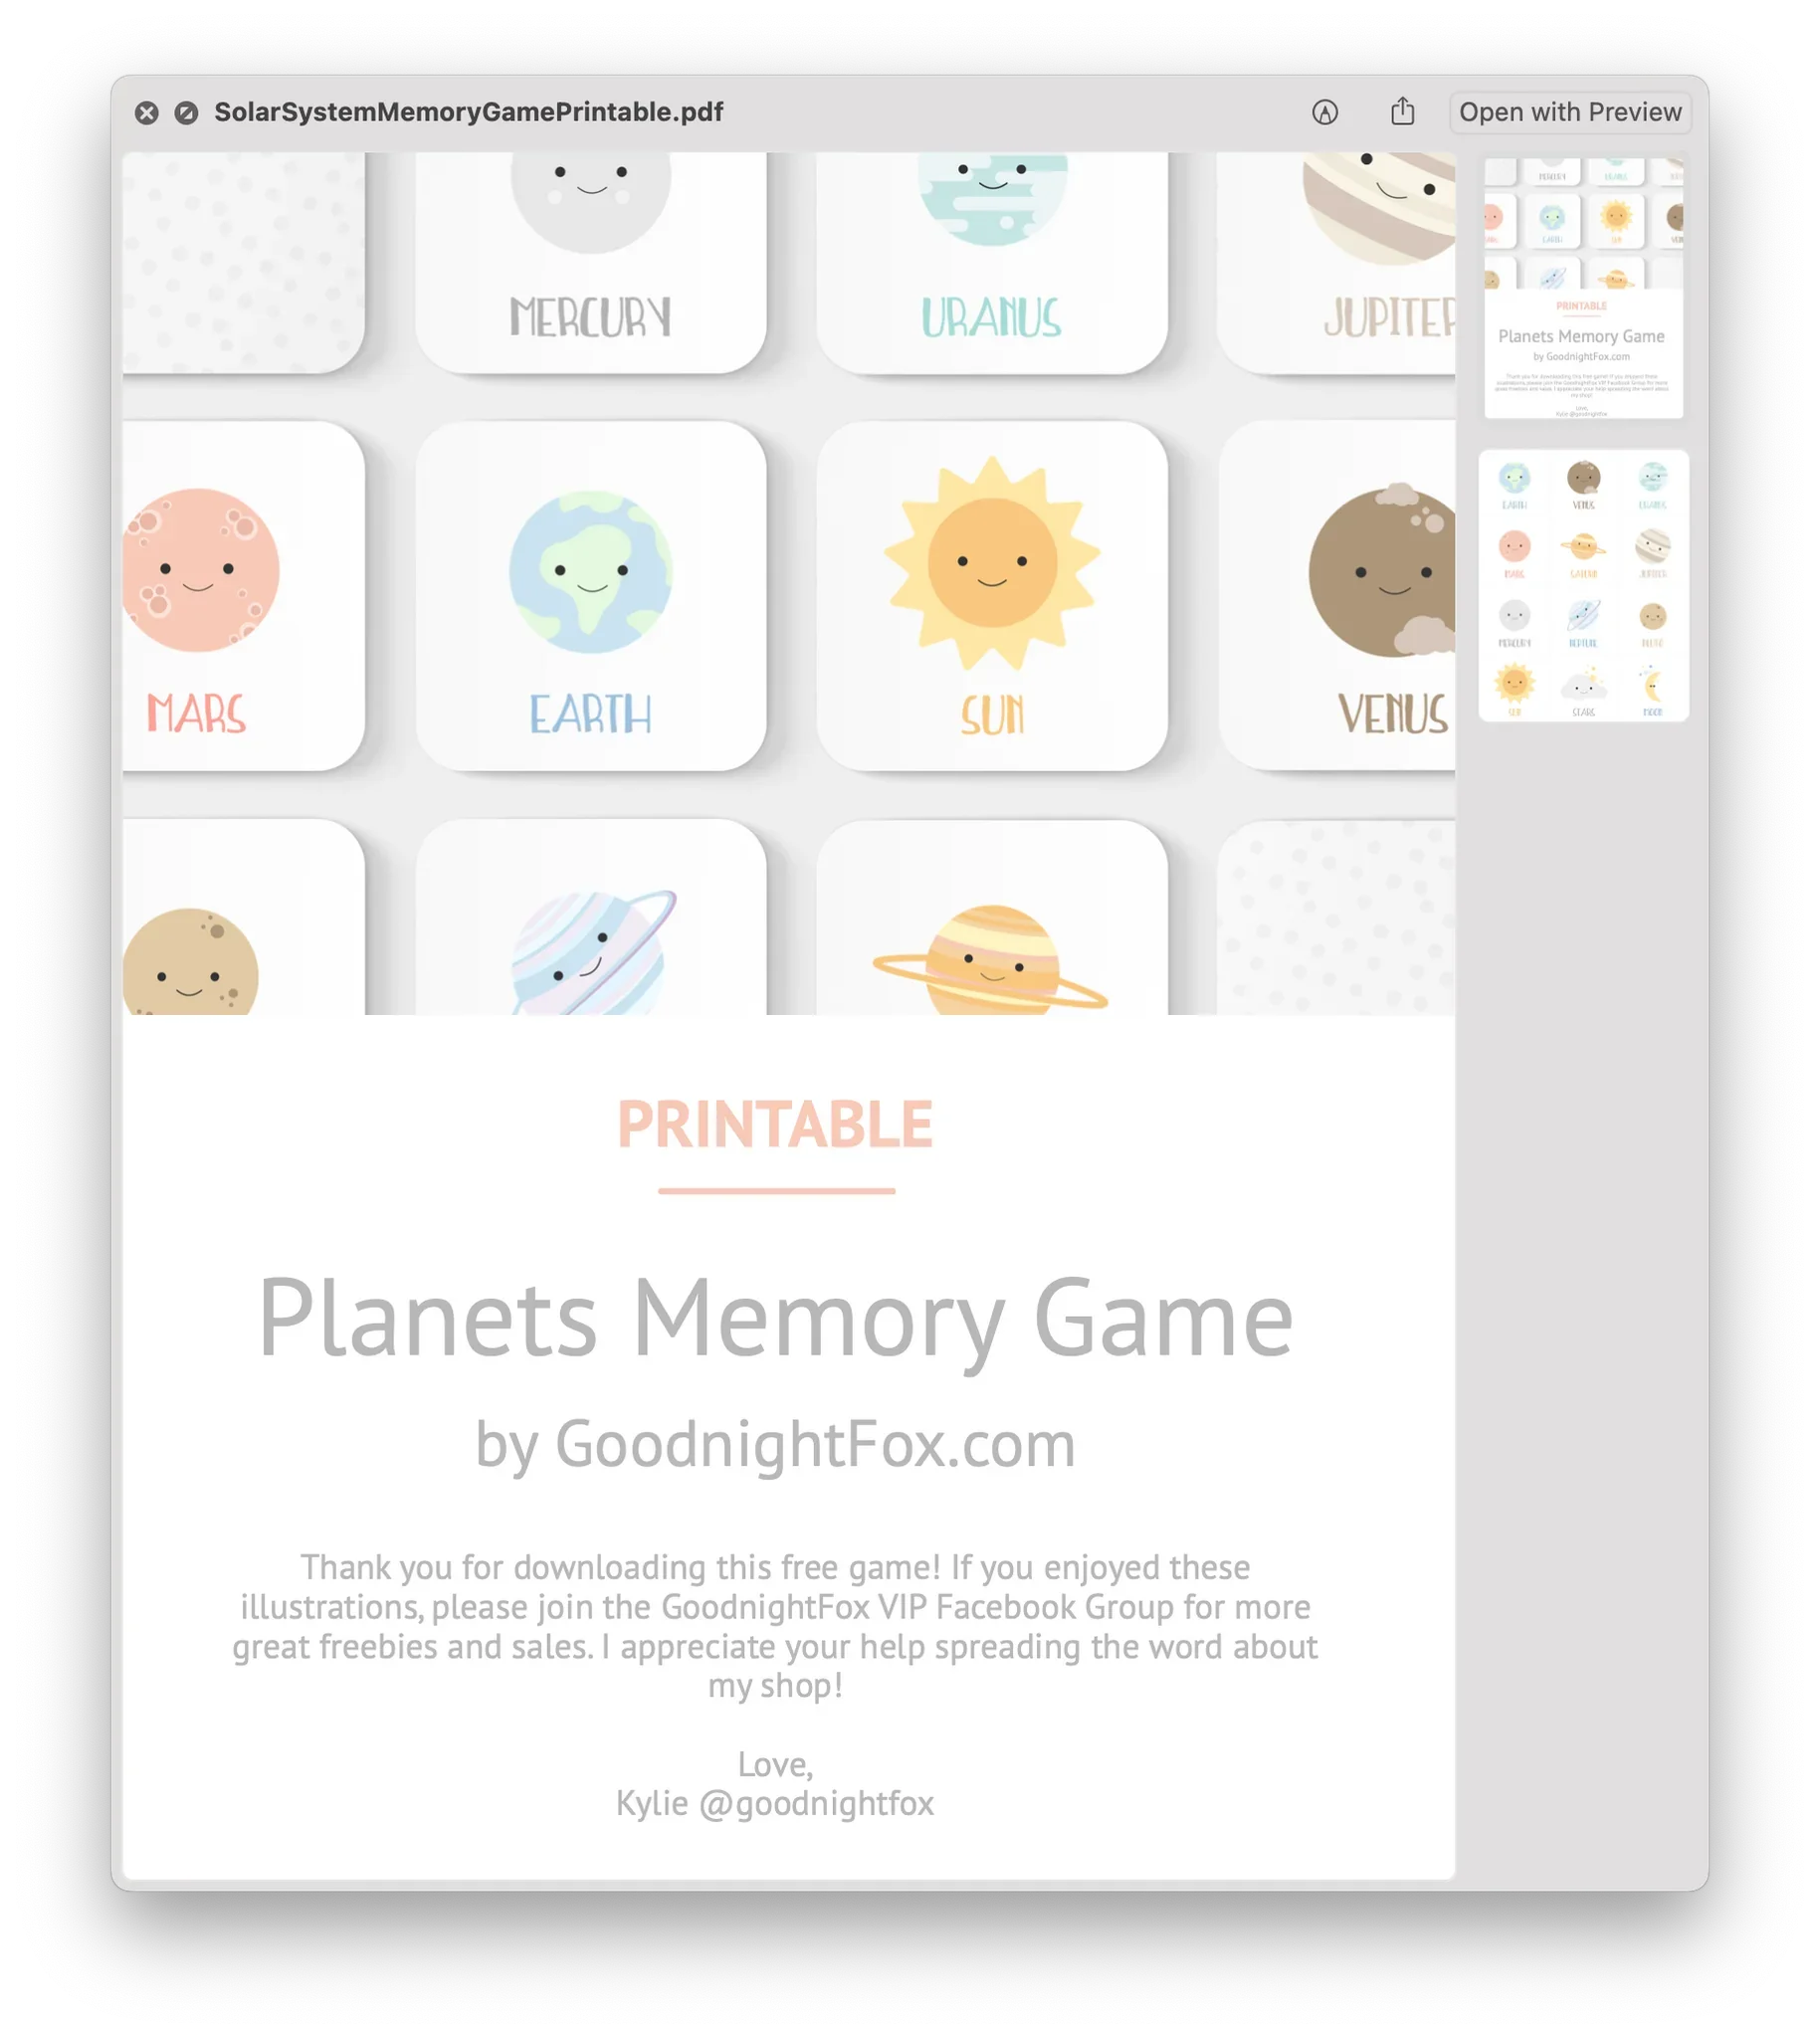
Printable planets memory game cards from GoodnightFox

have a little space explorer?

Keep the adventure going with a free planets activity from GoodnightFox. Join thousands of parents who get printable activities, sensory play ideas and play-based learning inspiration — starting with a printable planets memory game you can use today.

astronaut costume questions

How do you make an astronaut costume for a child?
Start with a shiny metallic or holographic jumpsuit — sewn from a zipper onesie pattern or bought ready-made — then add a pink ribbon belt, felt or faux-leather star patches and silver stripes on the sleeves and pants. Add a helmet cut from a clear plastic globe and a jetpack built from two recycled soda bottles.
How do you make a homemade astronaut jetpack?
Spray paint two empty soda bottles, decorate them with holographic strips and felt stars, then glue them side by side onto a cardboard box wrapped in silver fabric. Add flexible tubing into the tops as oxygen hoses, layered felt flames at the bottoms, and adjustable backpack straps so your child can wear it.
What can I use to make an astronaut helmet?
A large clear plastic globe or bubble — a big ornament globe works well. Cut a neck opening roughly 20–22 inches in diameter and a visor shape with a Dremel, sand the edges smooth, then trim every cut edge with folded fabric so nothing rough sits near your child's face. Cardboard and faux-leather hinges with small bolts let the visor pivot.
Can you make an astronaut costume from recycled materials?
Yes — most of this costume is recycled. The jetpack boosters are empty soda bottles and the pack base is a cardboard box, which is a big part of why the build is so budget-friendly.
How long does a DIY astronaut costume take to make?
The original tutorial doesn't give a total build time. It does note that cutting the helmet takes the most time of any step, and that the spray-painted bottles need 10–15 minutes of drying between coats, so plan it across more than one crafting session.
Child in the finished pastel astronaut costume with helmet and jetpack

ready for blastoff?

A cardboard box, a few recycled bottles and a little imagination can become something they'll remember long after Halloween is over.